HQ Menus allows you to import and export Menu Item CSV (Comma Separate Values) files, so you can add, edit, or archive a large amount of menu Items quickly. Use this article to learn how to use CSV files and fix common CSV errors.
How to Export an Item CSV File
Item CSV File Template
Item CSV File Fields
How to Add New Menu Items to a CSV File
How to Save CSV Files in Numbers & Excel
How to Import an Item CSV File
Common CSV Files Errors & How to Fix Them
How to Export an Item CSV File
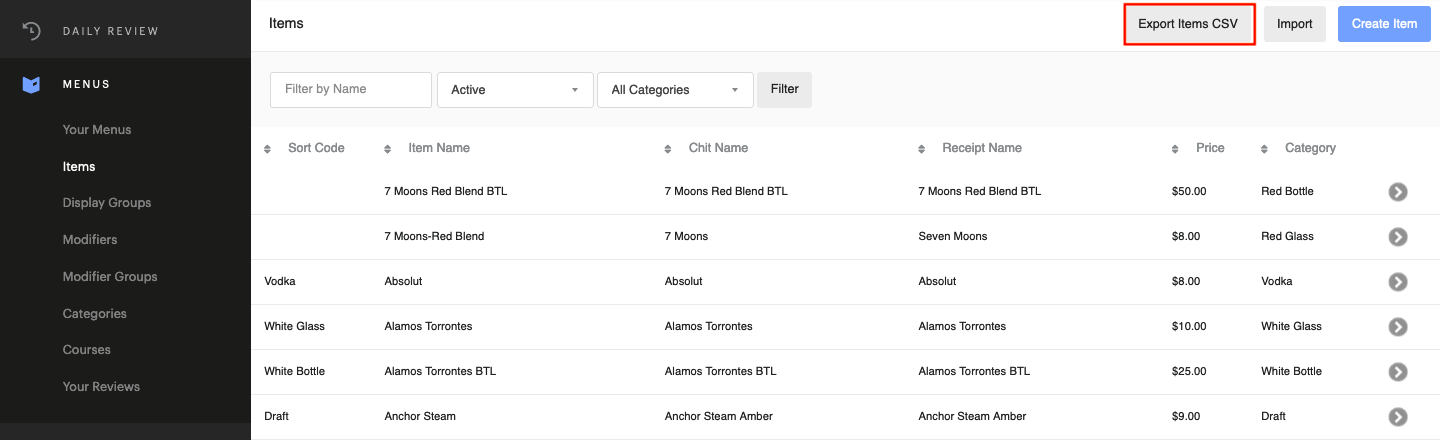
- Log into HQ
- Click on Menus > Items
- Click Export Items CSV
After the CSV file is exported, select the application you would like to use to open the CSV. You can edit CSV files in a spreadsheet application, such as Excel or Numbers (MAC). If there is no prompt on screen to choose an application, navigate to your computer Downloads folder to open the downloaded CSV file.
Excel CSV Example:

Numbers CSV Example:

Item CSV File Template
If you would like to start a new CSV file from scratch, you can also download a Item CSV file template.
- From the Item screen, click Import
- Click the sample CSV template link
- Select the application to open the file (Excel or Numbers) or navigate to your computer Downloads file to open the template
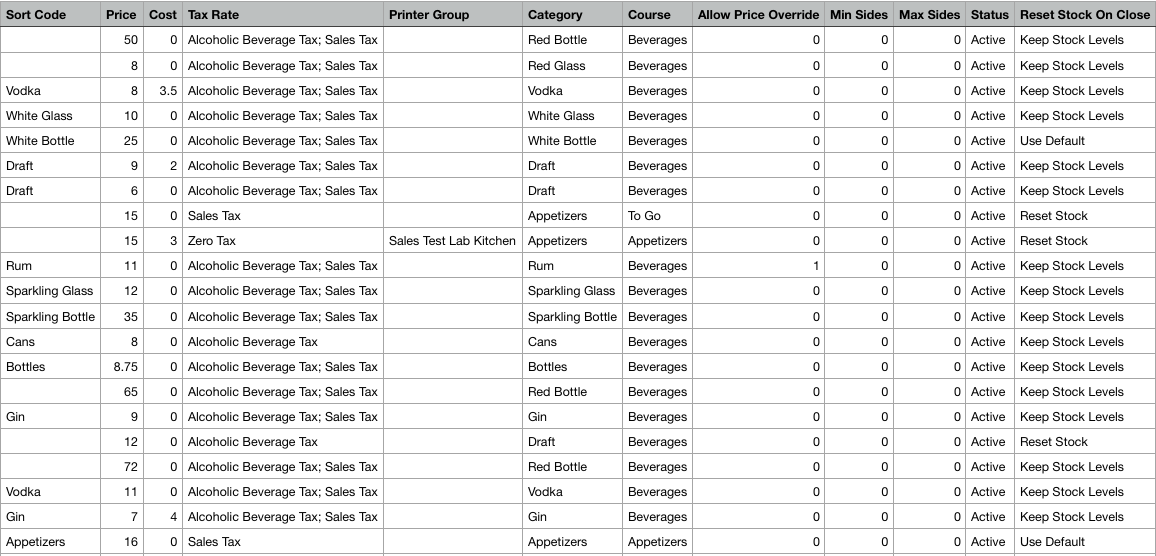
CSV File Fields
When editing or adding to CSV files, it is important that you do not change the column headers (Row 1) or the Item ID numbers (Column 1). The column headers in the CSV file will match the item fields in HQ. To learn more about item fields, visit Add or Edit a Menu Item.
Item ID - This will be filled in by HQ and should be left blank for new items. Do not edit this number for existing items. The ID could be used as a reference to determine which item is being edited.
Item Name - The name of the item in Upserve POS.
Online Menu Name - The name of the item on your Online Ordering page (if you use Online Ordering).
Chit Name - The name that will print on all chits; limited to 16 characters
Receipt Name - The name that will print on guest receipts; limited to 17 characters

Description (optional) - A description of the item to save in the system
Online Menu Description (optional) - A description of the item on your Online Ordering page (if you use Online Ordering).
Sort Code (optional) - A code that allows you to easily search for groups of item
Price - Item price. If the item has no price, enter 0.
Cost - Item cost. If you do not want to enter a cost, enter 0.
Tax Rate - Enter the name of tax rate exactly as it is spelled in HQ. Multiple tax rates can be divided by entering a semi colon between tax rate names. View a list of tax rates to choose from on HQ under Settings > Taxes.
Printer Group - The name of the printer group where the chit will print. If left blank, the item will inherit printer settings from its category.
Category - Enter the preferred item category, exactly as it is spelled in HQ.
Item Contains Alcohol (optional) - Input either Yes or No. By default this is set as No. This field is relevant only if you want to list Alcoholic items on your
Grubhub menu. By default, Grubhub will not list items containing Alcohol on your menu. Your restaurant must complete Grubhub compliance, otherwise the alcohol items will be automatically hidden from the menu.
The restaurant should work with their Grubhub Account Advisor/Enterprise Partner Manager to set up a Stripe account and get their liquor license on file. Checking this on the item level will tag the item for Grubhub to ensure you're within compliance before listing it on the menu. This checkbox currently serves no other purpose, and can be ignored if you are not using Grubhub.
Course - Enter the preferred item course, exactly as it is spelled in HQ.
Allow Price Override (optional) - Input a ‘1’ to allow price override on this item; leave blank or ‘0’ to set the price to fixed.
Min Sides - The minimum number of sides. Enter 0 if this item does not have sides.
Max Sides - The maximum number of sides. Enter 0 if this item does not have sides.
Status - Active items are visible in the Upserve POS menu. The status can be changed to Archived to remove it from the menu.
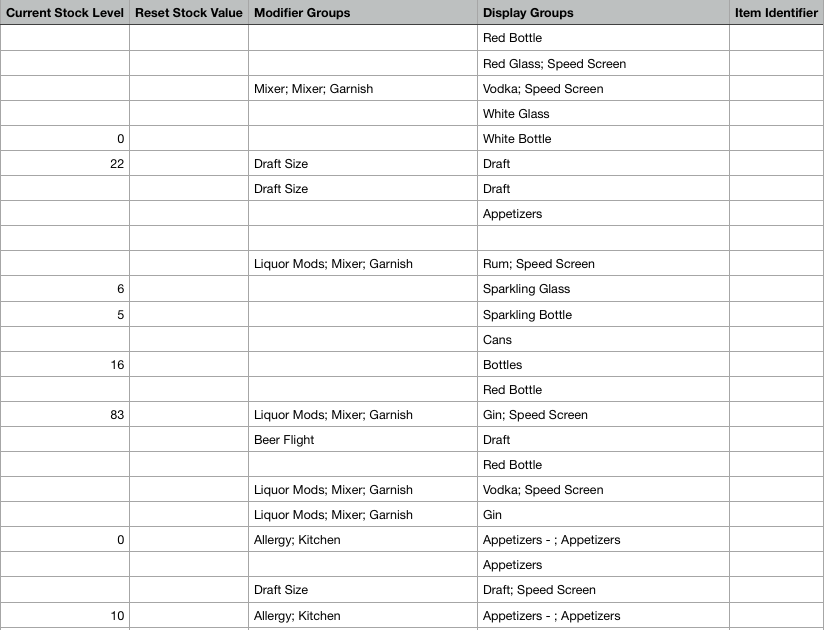
Reset Stock On Close (optional) - For items that have a stock level, enter the stock setting Use Default, Reset Stock or Keep Stock Levels. To learn more about stock levels, visit
Set an Item Count.
Modifier Groups (optional) - Enter the names of the modifier group(s) you would like to attach to the item. To add multiple modifier groups, enter the groups in the order you would like them to appear and separate them with a semicolon and one space. Modifier Group names need to be spelled exactly as they appear in HQ.
Display Groups (optional) - Enter the names of the Display Group(s) you would like to add the item to separated by a semicolon and one space. Display Group names need to be spelled exactly as they appear in HQ.
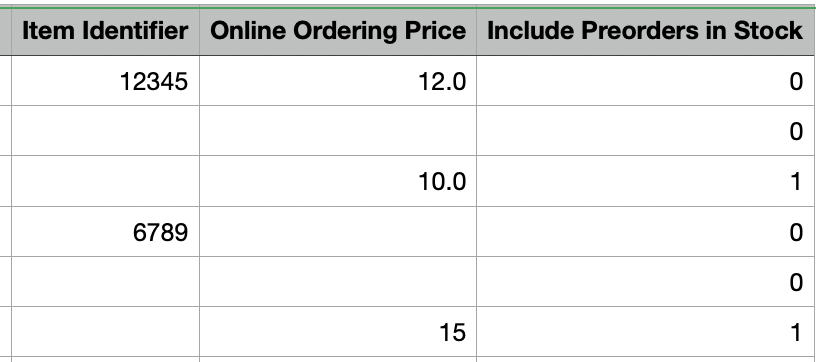
Item Identifier (optional) - Identifier codes are sometimes required for menu integrations. If you use Upserve Inventory, you can also use this field to enter menu item codes for inventory. An identifier code can be a series of numbers/letters or the name of the item.
To learn more about Inventory Menu item codes, click here.
Online Ordering Price (optional) - If you wish to have an item be a different price on Online Ordering than it is on the Point Of Sale, you can enter the price in the Online Ordering Price field. This price will reflect on Lightspeed U-Series Online Ordering as well as BiteKiosk, Zuppler, and Chowly. Grubhub does not support this feature, and will list the amount in the Price field above. Leaving this field blank will adopt the amount set in the Price field.
Include Preorders in Stock (optional) - This is an Online Ordering setting that can be enabled for Android Stationary Upserve POS-only at this time.
If you use Upserve Online Ordering, allow ordering ahead and apply stock levels to online ordering menu items, you can enable this setting to deplete item stock levels when stock level items are ordered ahead.
If you would like to enable this setting for an online ordering menu item, enter a '1' in the item row for this column. If you don't want to use this setting or want to turn it off for an item, enter a '0' in the item row.
To learn more about Online Order Preorders and this setting, click here.
How to Add New Menu Items to a CSV File
CSV files can help you to add a large number of items to HQ in one import, instead of adding items one at a time.
- Scroll to the bottom of the CSV file
- Click in the last row and right click to Insert a Row (If using Excel, you will not need to insert new rows)
- Leave the Item ID blank in the new row
- Name the new item
- Enter item information using CSV File Fields as a guide
- Continue inserting new rows and adding new items
- Save CSV file when you have finished adding items
- Import CSV in to HQ
| Note: If you are adding items to a CSV file using Numbers, you must delete any extra blank/empty rows before importing the CSV file into HQ. Rows that are completely blank in Numbers will cause the import to fail. |

How to Save CSV Files in Numbers & Excel
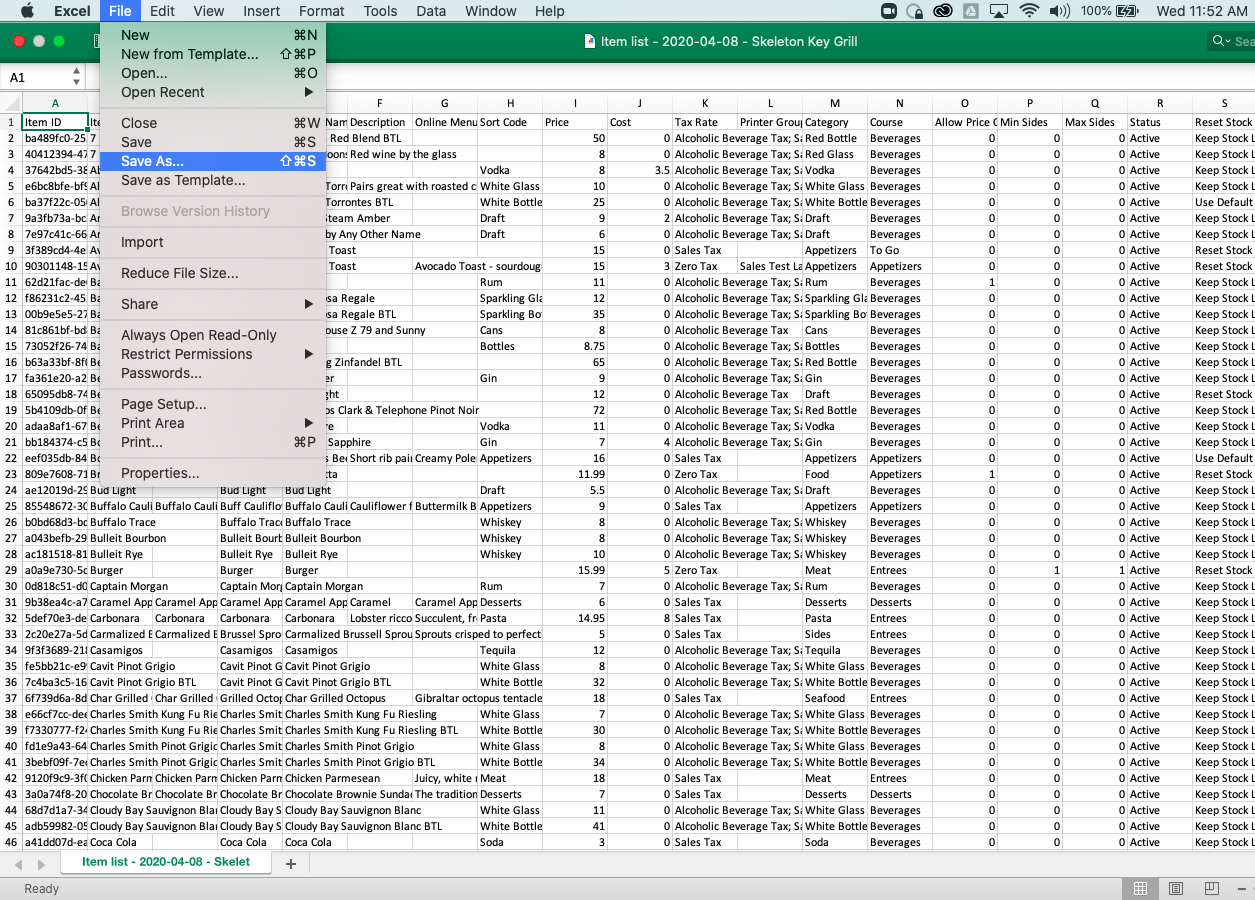
When you have finished editing the item CSV file, you will want to save this file with a new name to preserve the original downloaded CSV copy. Excel and Numbers require different steps to save the CSV file.
Save CSV File in Excel
- Click File
- Click Save As
- Re-Name CSV File and select preferred Folder
- Click Save & Click Yes


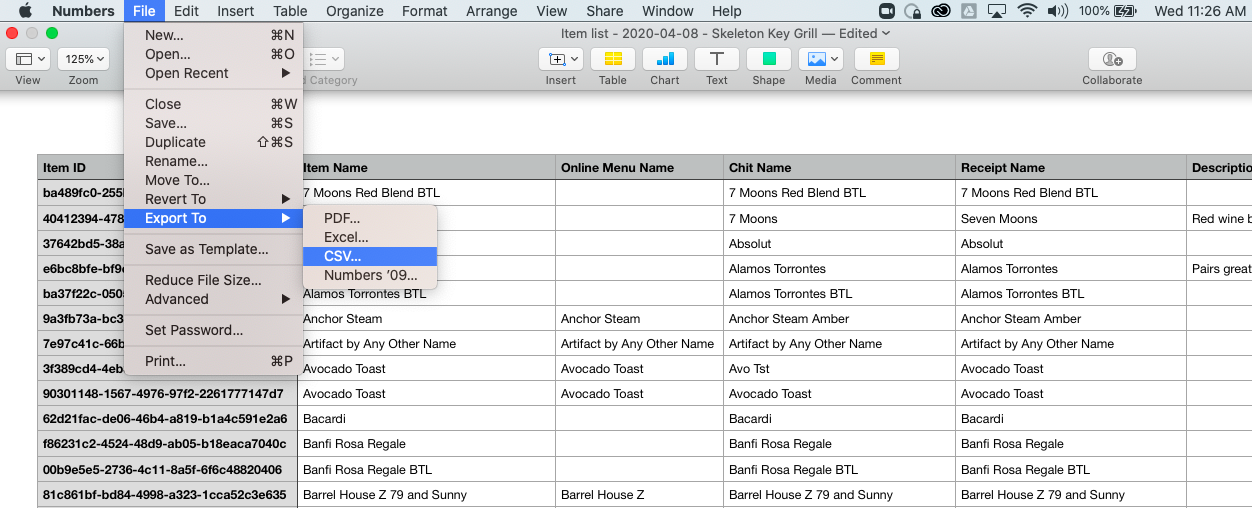
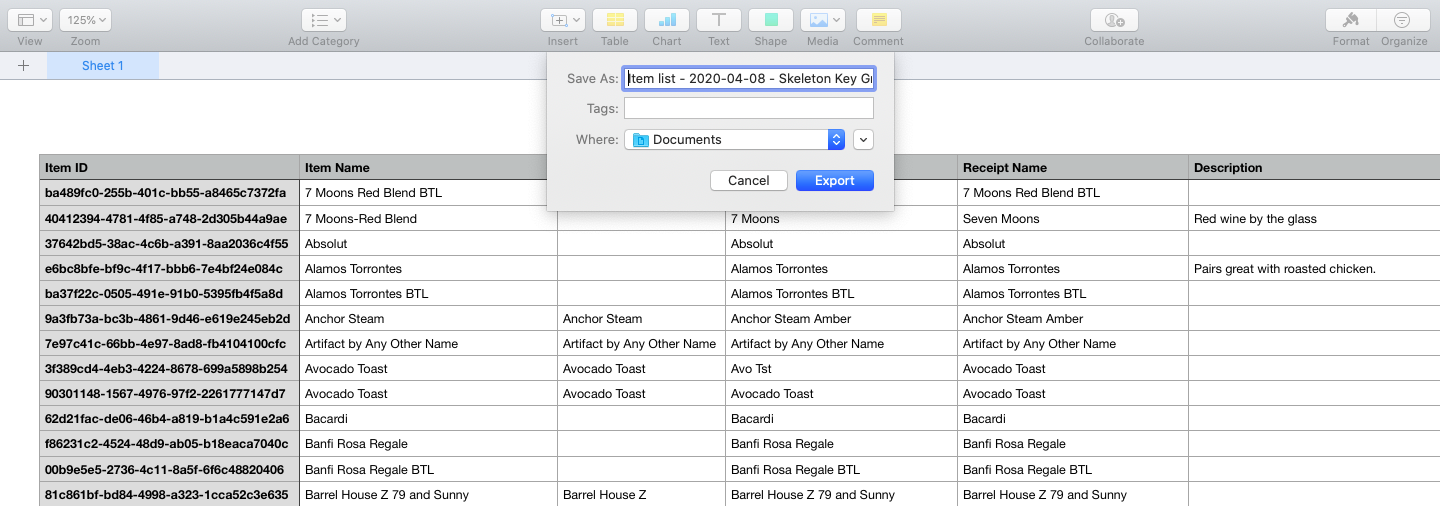
Save CSV File in Numbers
- Click File
- Click Export To > CSV
- Click Next
- Re-Name CSV File and select preferred Folder
- Click Export

How to Import an Item CSV File
After you save the edited CSV file, return to HQ to import the CSV file.
- Log into HQ
- Click on Menus > Items
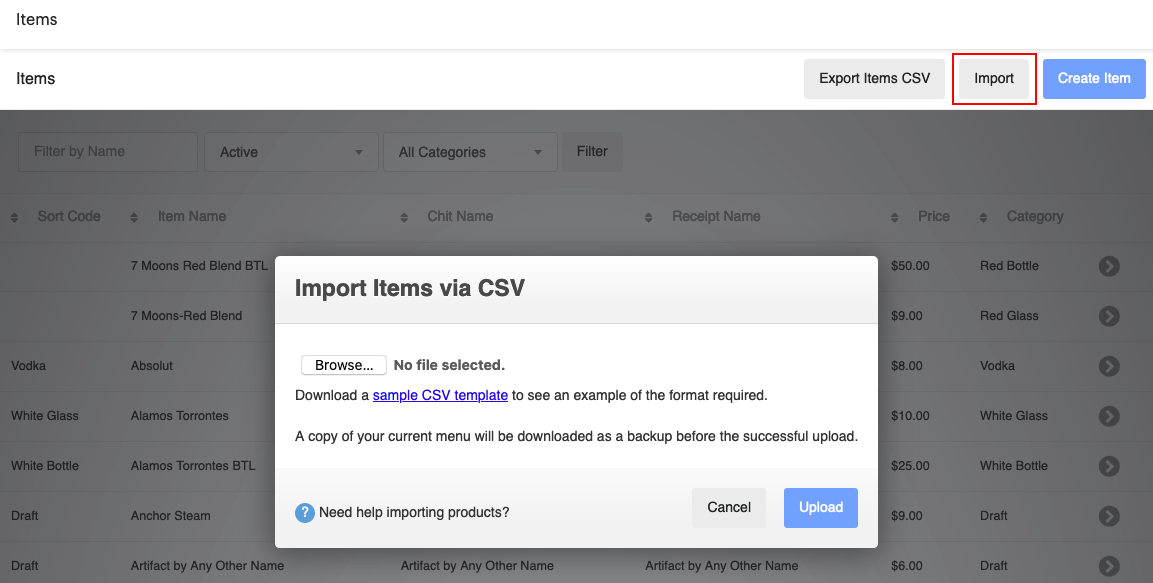
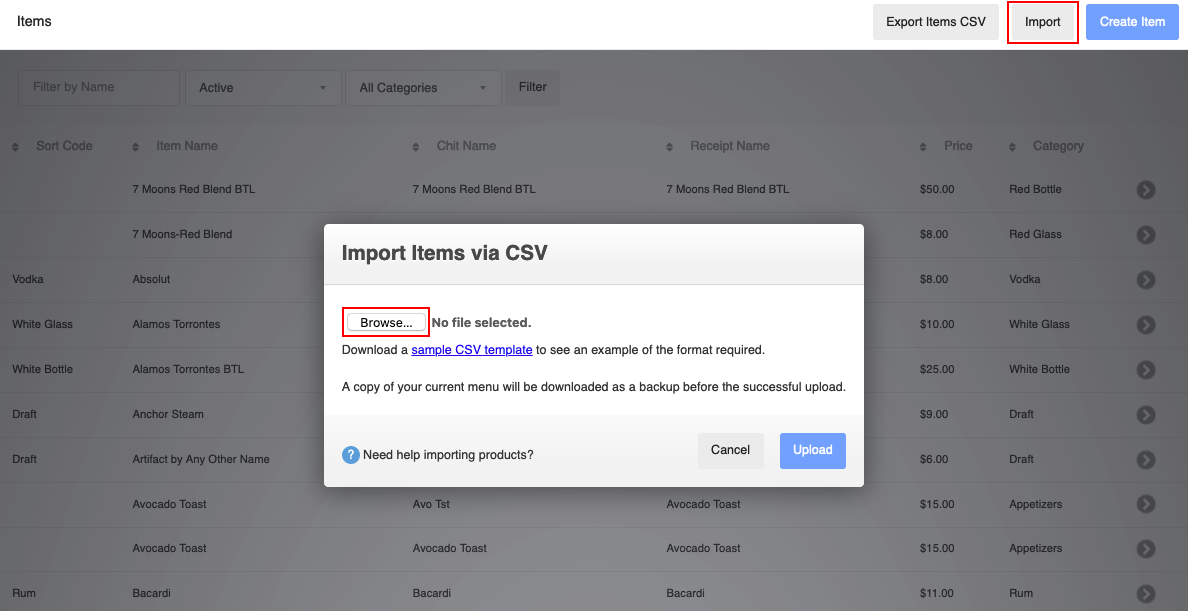
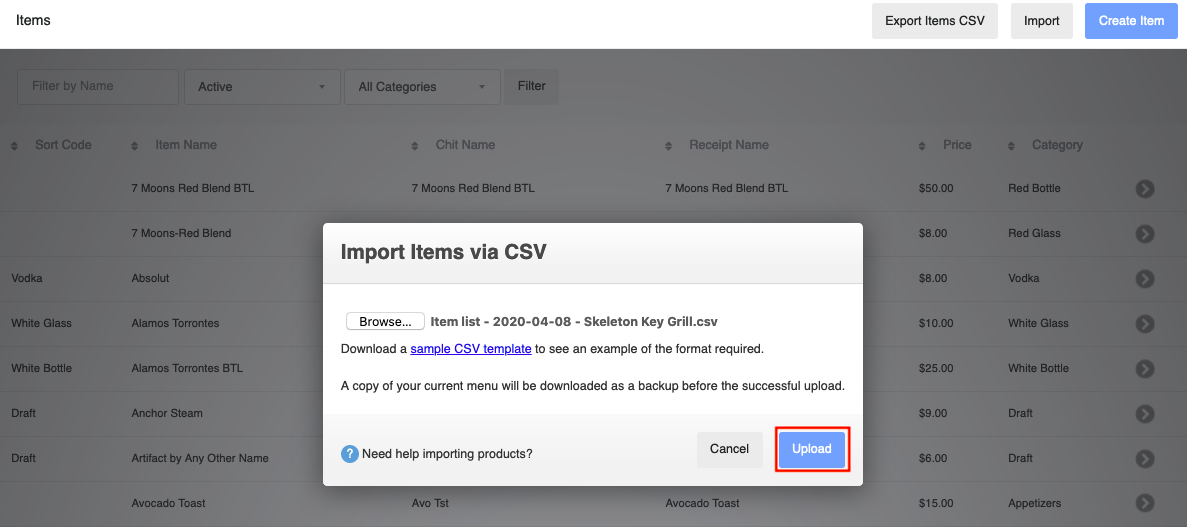
- Click Import
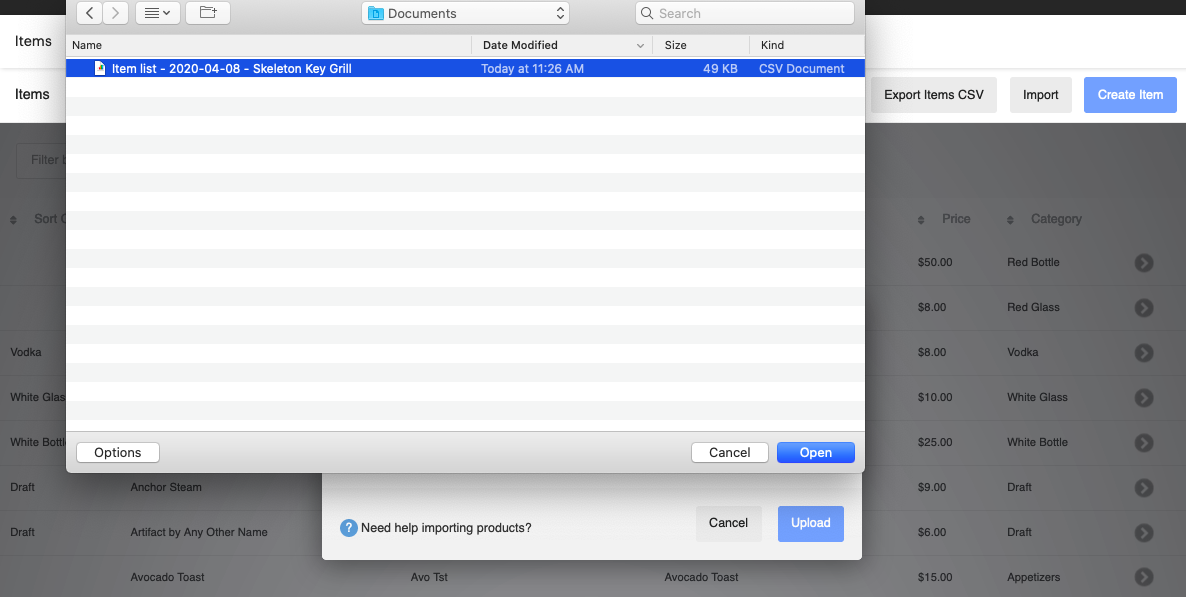
- Click Browse and select the saved CSV file
- Click Open and Upload
- Wait one or more minutes for the file to completely upload
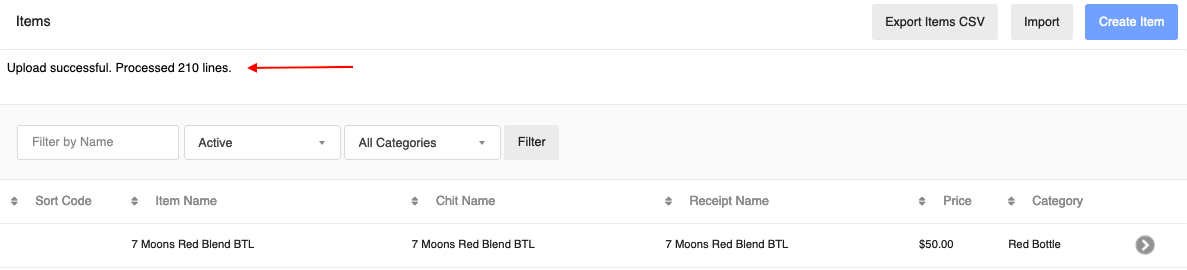
- An Upload Successful message will appear on screen when the file is uploaded
If an error appears on screen, visit Common CSV File Errors & How to Fix Them.
| Note: When you import a CSV file, HQ will automatically download a CSV file of your original menu to ensure that you have a backup copy. |
Common CSV Files Errors & How to Fix Them
If the CSV File has a mistake(s) on it or cannot be uploaded, you will see a red error on the item page after you attempt to Import the CSV file. The error will indicate what line in the file is causing the error and will provide some details about why the error is occurring.
| Note: In the example above, line 10 has an error. The CSV file column headers appear on line 1 in Excel and Numbers, so your item list line 1 will always be line 2. To resolve an error on line 10, you will actually need to look at line 11. |
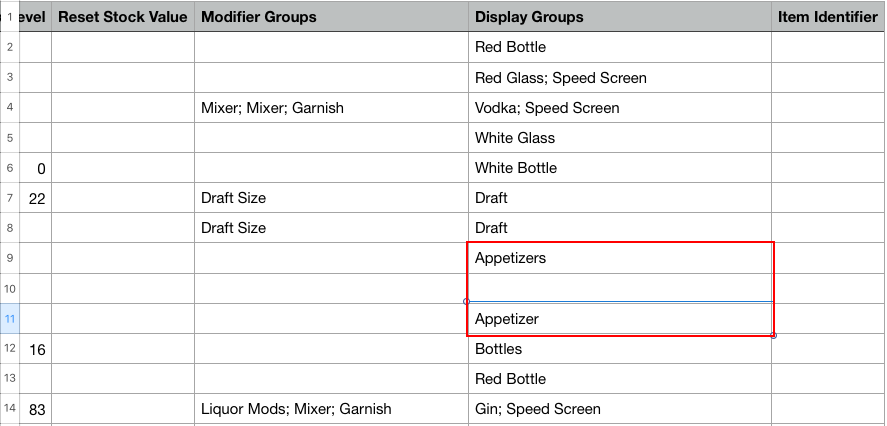
CSV Spelling Must Match HQ Spelling
When adding an item to a CSV file or editing an existing item, the spelling for the item Category, Course, Display Group, Printer Group, Tax Rate, Sides and Modifier Group must match HQ exactly. If you have a category called 'Appetizer' in HQ, typing 'Appetizers' in the category field will cause the CSV file import to fail. 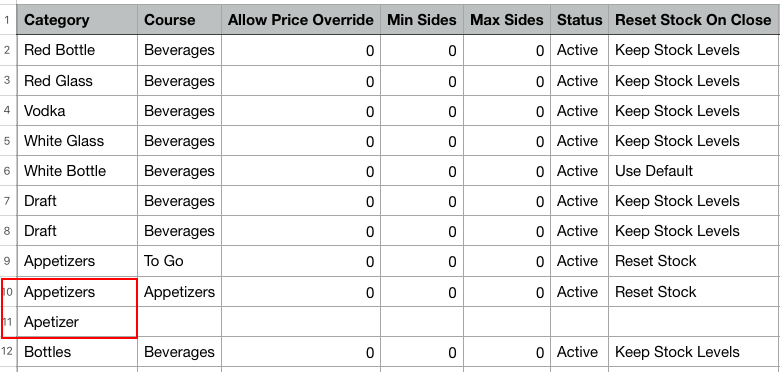
Extra Spaces, Invalid Characters, Missing Information
Extra spaces, invalid characters and missing information can also cause CSV import errors. If there is a space before a word, the CSV file will fail to upload. If symbols or accents are used in the CSV file that don't exist in HQ, the CSV file will fail to upload. It is best practice to proof read any changes you make to the CSV file and delete extra spaces.
Invalid Characters
If you see an error message saying "Invalid Character on line XXXX" while uploading the .CSV file, this issue is caused by a character that the system is unfamiliar with and is unable to convert it into typical text formatting.
We recommend utilizing only normal alphabetical and numerical characters within your menu and within the .CSV upload file.
Examples of Characters Not to Use: ½, ó, è
Missing Information
Missing information from a CSV file row can also cause an import error. For Price and Cost, make sure to enter 0 instead of leaving these fields blank when an item does not have a price or a cost.
Extra Blank Rows in Numbers
If you are using Numbers to edit CSV files, extra rows can cause the file import to fail. When you have finished editing the CSV file, make sure to delete extra or blank rows from the CSV file. The last row of the sheet should have an item. There should not be any blank rows after the last item.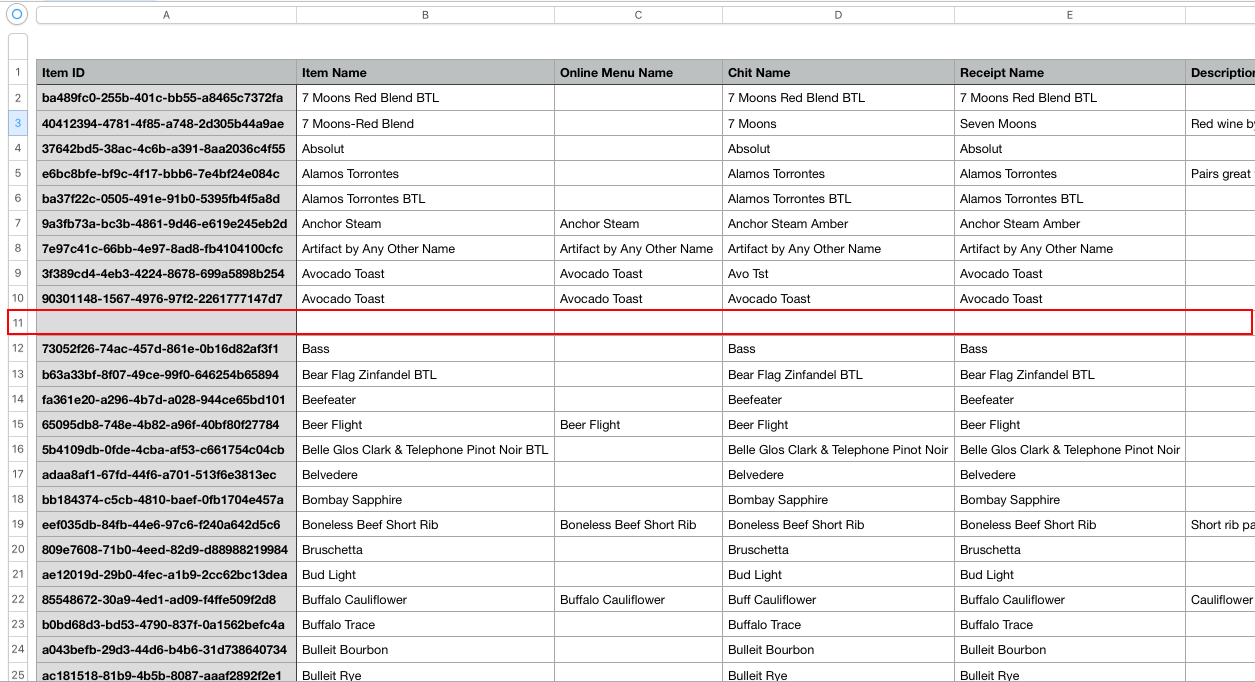
Duplicate Items
If Item IDs are deleted before importing the CSV file into HQ, new Item IDs will automatically generate and duplicate items will be created. You should never delete Item IDs. You should only leave the Item ID cell blank when you are adding a new item(s) to the CSV file, so HQ will automatically assign the new item an Item ID.
File Too Large
If you have hundreds of menu items on a CSV file, sometimes the CSV file might fail to import because the file is too large. If your CSV file is too large, you can split the CSV file into multiple smaller CSV files and import them separately. Without deleting the Item ID, cut and paste a number of item rows into a new CSV template. You will not have duplicate items as long as you keep the original Item IDs for each item. Save each new CSV file and import separately.
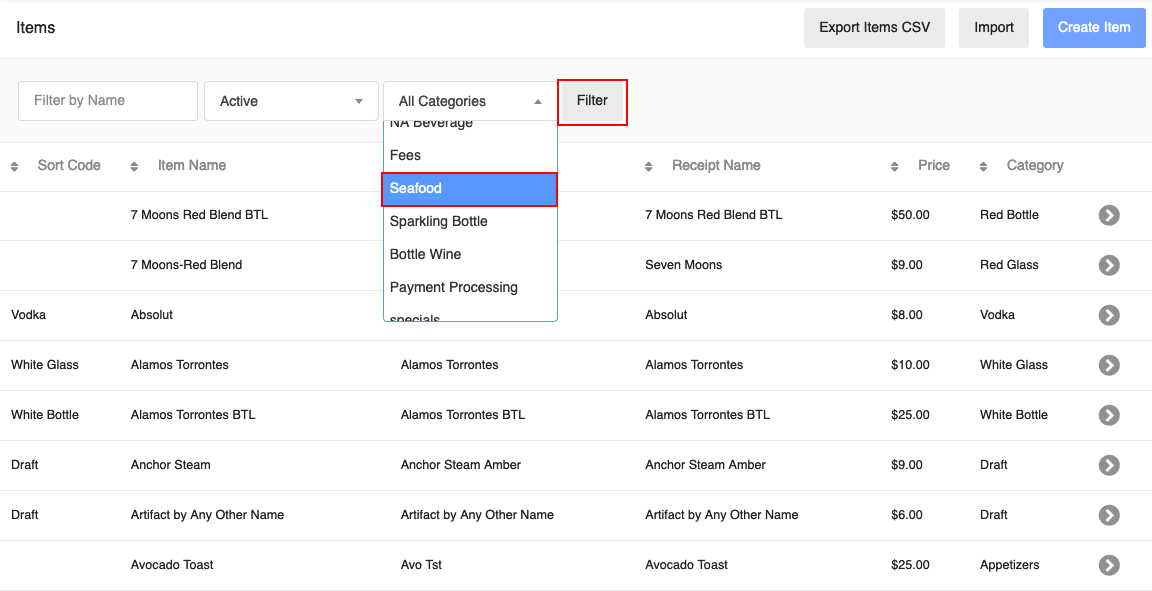
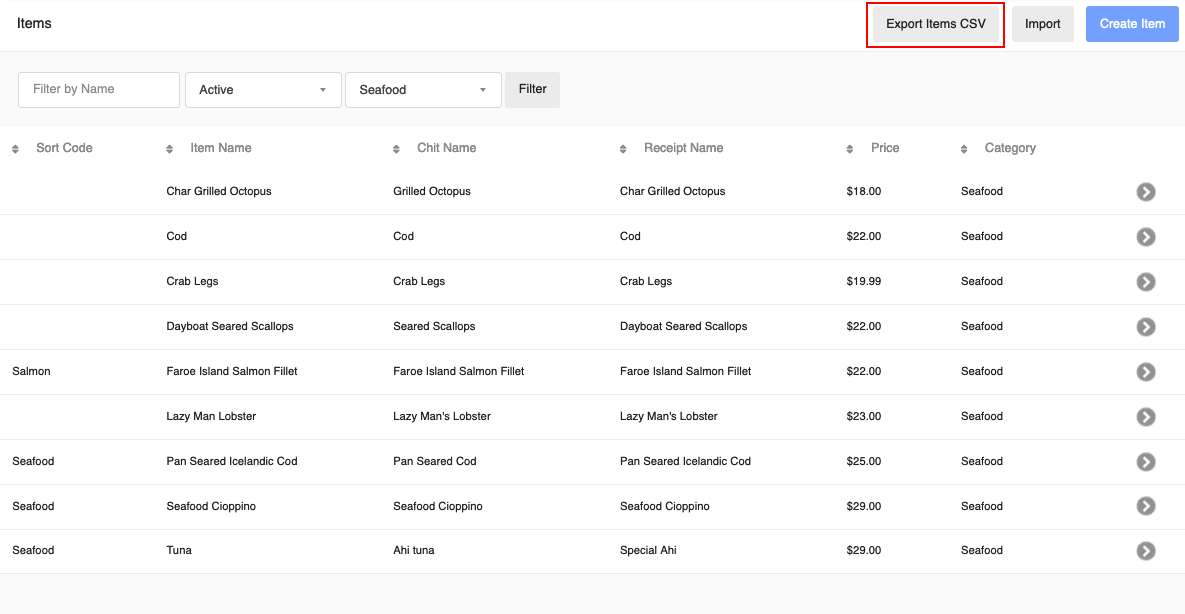
Alternatively, before you export an Item CSV file to edit, you can filter the item list by category to create a smaller file.
- From the Item list, click All Categories
- Select Category
- Click Filter
- Click Export Items CSV