Whether you're setting up your U-Series POS hardware for the first time or setting a new piece of terminal hardware, you can refer to this guide to learn how to connect your networking and terminal hardware.
Review this article to learn how to set up your U-Series POS hardware from start to finish, or use the quick links below to jump to any section. You can also download our PDF Installation Guides:
iPad Terminal Installation Guide
Android Terminal Installation Guide
If you're setting up U-Series POS hardware for the first time, watch our Hardware Troubleshooting video, so you can identify and troubleshoot common hardware issues during installation.
Set Up Your Network
Connect Your Router
Connect a Switch
Connect Your Access Points
Set Up Your Terminals
iOS Terminals
Android Terminals
Tableside Devices
Set Up Printers & Cash Drawer
Connect a Receipt Printer
Connect a Cash Drawer
Connect a Kitchen Printer
Set Up HQ Printers & Printer Groups
Video: Hardware Troubleshooting
Additional Hardware Resources
Set Up Your Network
Connect Your RouterConnect a SwitchConnect Your Access Points
Confirm Your Cable Or DSL Modem is Active & Online
Your modem is provided by your Internet Service Provider (ISP), such as Comcast or Time Warner. Ensure that the device is powered on and activated with your ISP.
Connect Your Router to Power Your Network


- Plug the Meraki MX64W/MX64 ROUTER into a power outlet using the black power cable.
- Connect the ROUTER to your MODEM using an ethernet cable.
- One end of the ethernet cable will connect into the internet port on the back of the ROUTER.
- The other end will connect to any available ethernet port on the back of the modem.
- Initially, the light on the front will be orange. It will begin to cycle through an array of colors as the router attempts to connect to the internet.
- When properly connected, the ROUTER will display a solid white light.
Connect Your Switch to the Network (if applicable)
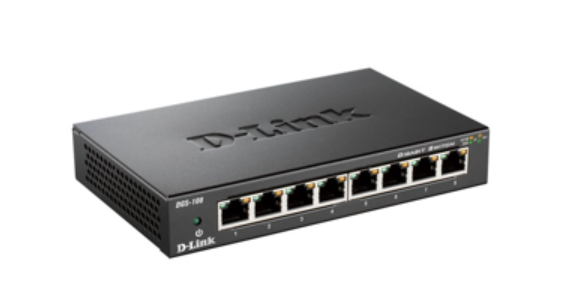
- Plug the SWITCH into a power outlet using the black power cable.
- Connect the SWITCH to your ROUTER using an ethernet cable.
- Use any of your ROUTER’s ethernet ports, labeled 1-4, and use any available ethernetport on the SWITCH.
Connect Your Access Point to the Network

- The ACCESS POINT extends the reach of your ROUTER, delivering stronger Wi-Fi coverage in areas where your router signal may be weaker. Place your access point in areas with weak Wi-Fi coverage.
- Plug the Meraki MR33 ACCESS POINT into a power outlet using the black power cable.
- The power cable is packaged separately in a small, white box.
- Instead of a power cable, your MR33 may come with a POE injector (Power over Ethernet). To install this, plug the POE injector into Power. There are two ports on this device: one is labeled IN, the other OUT.
- Connect the IN port to the router. Connect the OUT port to the access point.
- Connect the ACCESS POINT to your ROUTER using an ethernet cable.
NOTE: If there are no ethernet ports available, disconnect any old, unused devices or low priority devices. You will be able to connect them to the ROUTER instead.
If the devices do not display a white light after 10 minutes, please contact our Support Team by clicking on the chat icon at the bottom right of this page. |
Set Up Your Terminals
iOS TerminalsAndroid TerminalsTableside Devices
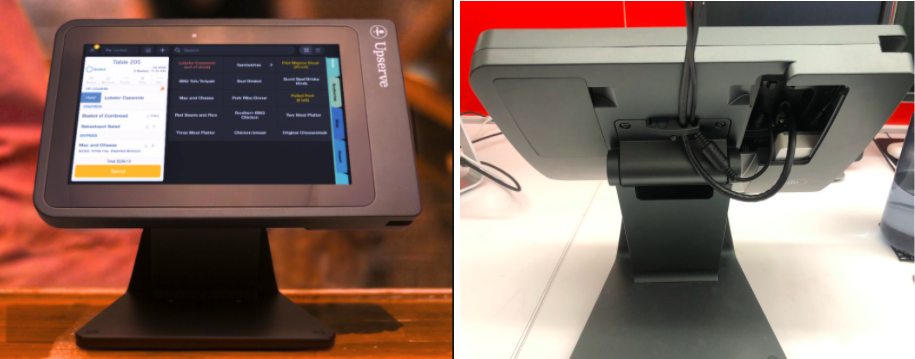
iOS Terminals
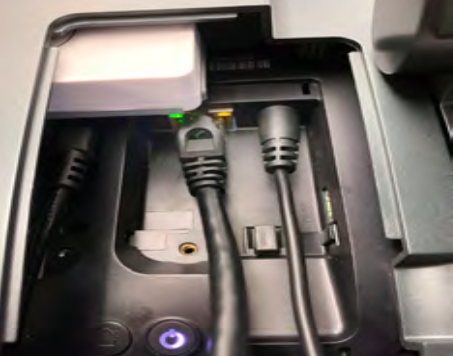
1. Unbox your pre-assembled TERMINALS (iPad, stand, card reader) and place them in their designated locations.
2. Plug in the TERMINALS using the micro-USB power cable and white iPad 12 watt power brick.
- The iPad power brick can be found inside the iPad box.
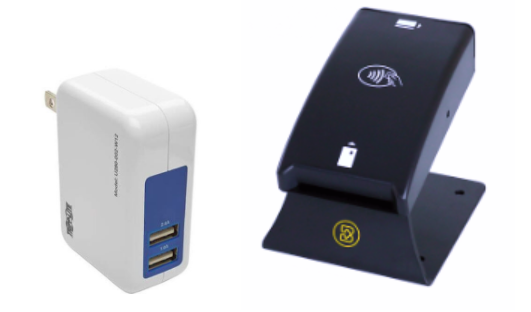
- If you have an EMV reader, you'll have a dual-port charging brick. Plug the iPad into the 2.4 amp USB slot. Plug the EMV reader into the 1.0 amp USB slot. Learn how to pair the EMV reader with your iOS terminal by clicking here.
3. If you are using the Meraki router, the TERMINALS should automatically connect to your Wi-Fi.
| NOTE: You must use the accompanying micro-USB power cable and white iPad 12 watt power brick. Any generic alternatives may not charge your terminal effectively. |
For iPads Not Purchased From U-Series
Every iPad terminal requires a terminal license. If you elected to use a terminal that you did not purchase from U-Series, follow these setup instructions:
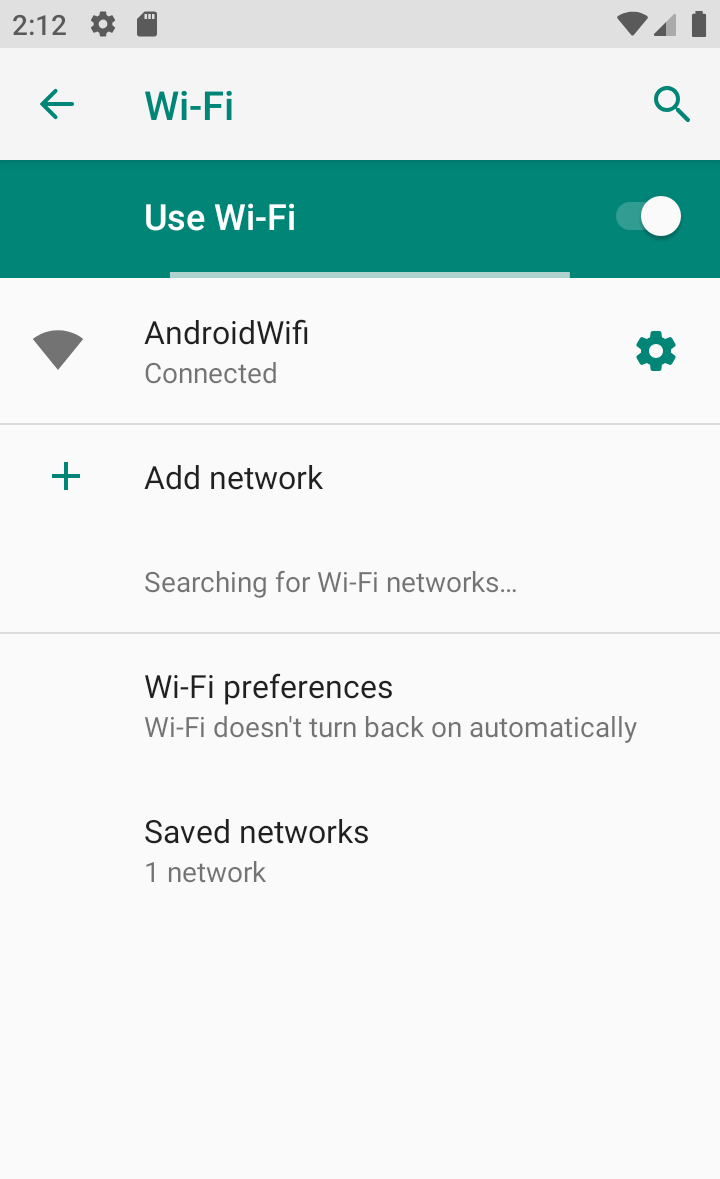
Connect your iPad to the POS wireless network
- From your iPad, tap the Settings icon and then tap Wi-Fi.
- On the list of available networks, tap “[your venue’s name] POS”.
- A checkmark will appear next to your network name when you are connected.
Download the latest version of U-Series POS and log in.
- Open the App Store app.
- In the search bar in the top right corner, type Lightspeed Restaurant U-Series
- Select the app by tapping Get and then Install.
- Once installed, open the app and log in with your HQ email and password.
Android Terminals
1. Unbox your TERMINALS and place them in their dedicated positions.
2. Plug the TERMINAL into the network with an ethernet cable.
3. Plug the terminal into power.
- When the terminal is online and the screen loads, it will go directly to the U-Series login page.
- If the terminal gets stuck on the loading page, please contact our Support Team by clicking on the chat icon at the bottom right of this page; the device may need to be registered.
Android Terminal Installation Video
Tableside Devices
When you receive your device, you'll need to charge the device and connect to it to your POS Network.
Charge Tableside & Connect to WiFi
- Charge the device
- Hold the side button to power on
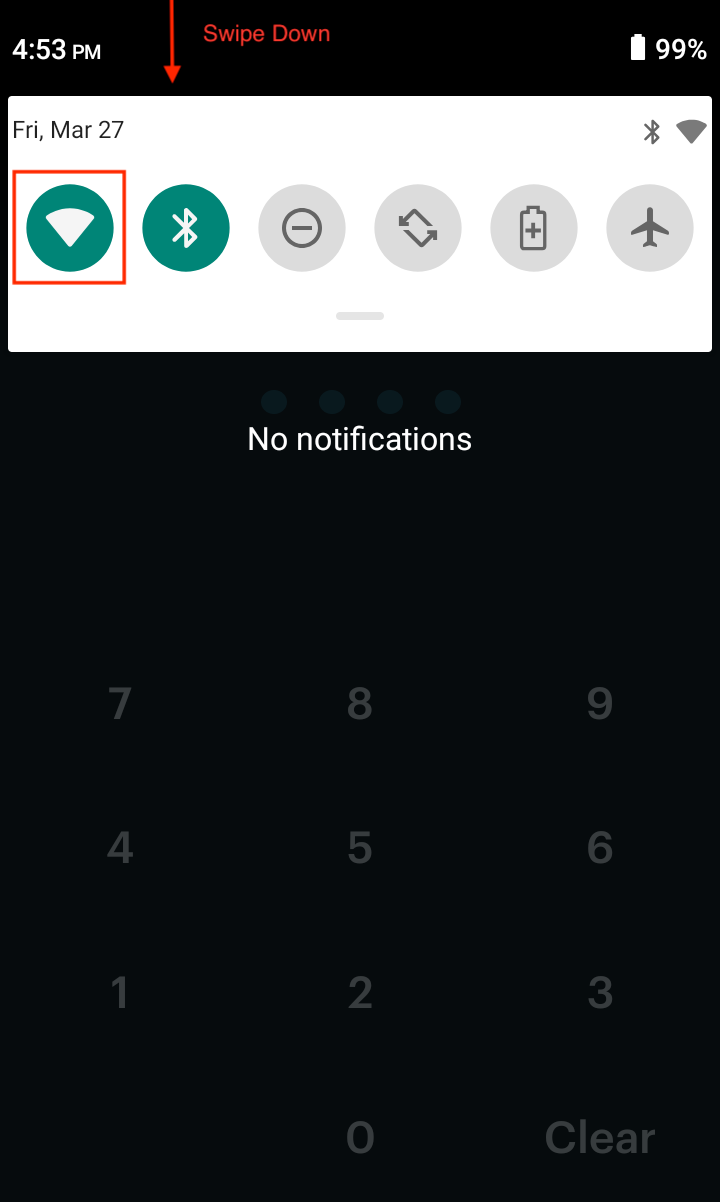
- Swipe down from the top of the screen and tap the WiFi icon
- Your device will search for Networks. Click on your POS Network & enter your WiFi password
- To finish configuring you device settings, visit Getting Started with U-Series Tableside
Connect Tableside to the Same Network as Stationary Terminals
If your Tableside device is on a different network than you stationary UPOS terminals, your Tableside device will not be able to print. Connect your Tableside device to the POS Network and setup printers using Printing on U-Series Tableside.
Set Up Printers & Cash Drawer
Connect a Receipt Printer to the Network
Connect Your Cash Drawer
Connect a Kitchen Printer to the Network
Set Up Printers & Printer Groups
Connect a Receipt Printer to the Network
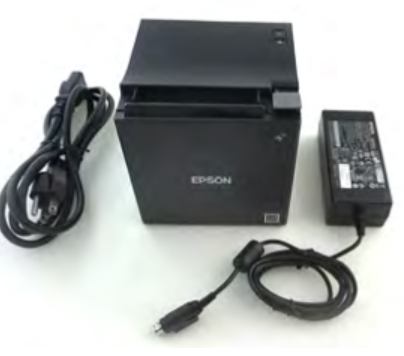
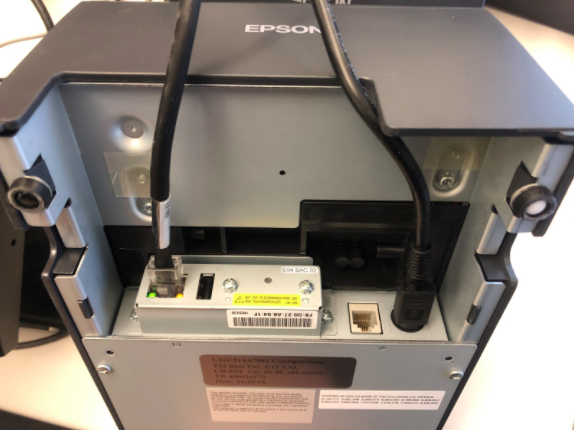
- Plug the RECEIPT PRINTER into a power outlet using the black power cable.
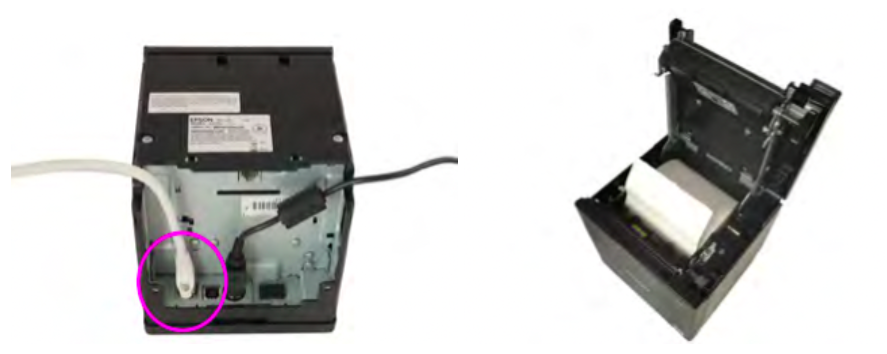
- To load paper into your RECEIPT PRINTER, open the top of the device and insert the roll, paper feeding from the bottom.
- Connect the RECEIPT PRINTER to the ROUTER or SWITCH using an ethernet cable.
- If your lines are wired through walls, or if the ethernet cable doesn’t extend far enough, you may need an IT professional or low voltage electrician to assist in tracing any existing ethernet lines or to install new lines.
To learn how to set up a wireless Epson TMM-30 printer see Setting up the TM-M30 Wireless Printer.
Receipt Printer (TM-m30) Installation Video
Connect Your Cash Drawer
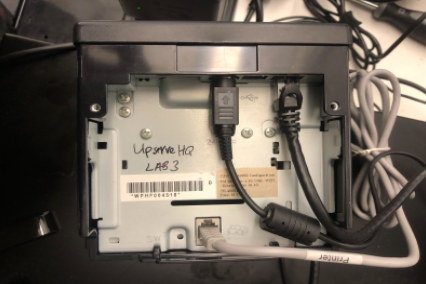
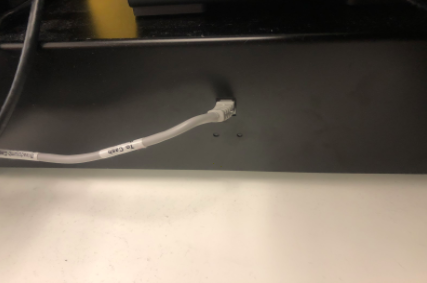
- Your cash drawer cable is located underneath your CASH DRAWER in the box.
- Connect the cash drawer cable from the cable port on the back of the CASH DRAWER to the RECEIPT PRINTER phone port (labeled “DK”).
- Check the orientation to make sure the end of the cash drawer cable labeled “to cash drawer” is plugged into the CASH DRAWER.
- Take the key from the underside of the CASH DRAWER and store it in a safe place.
Connect a Kitchen Printer to the Network
Epson U220B
- Plug the Epson U220B KITCHEN PRINTER into a power outlet using the black power cable.
- The KITCHEN PRINTER will require the use of an ink ribbon.
- Insert the ribbon by lifting the front panel of the printer and snapping it into place.
- The wheel on the cartridge should be facing up and to the right, with the ribbon slipping in snugly behind the metallic block.
- Connect the KITCHEN PRINTER to the ROUTER or SWITCH using an ethernet cable.
Star SP700 and Star SP742
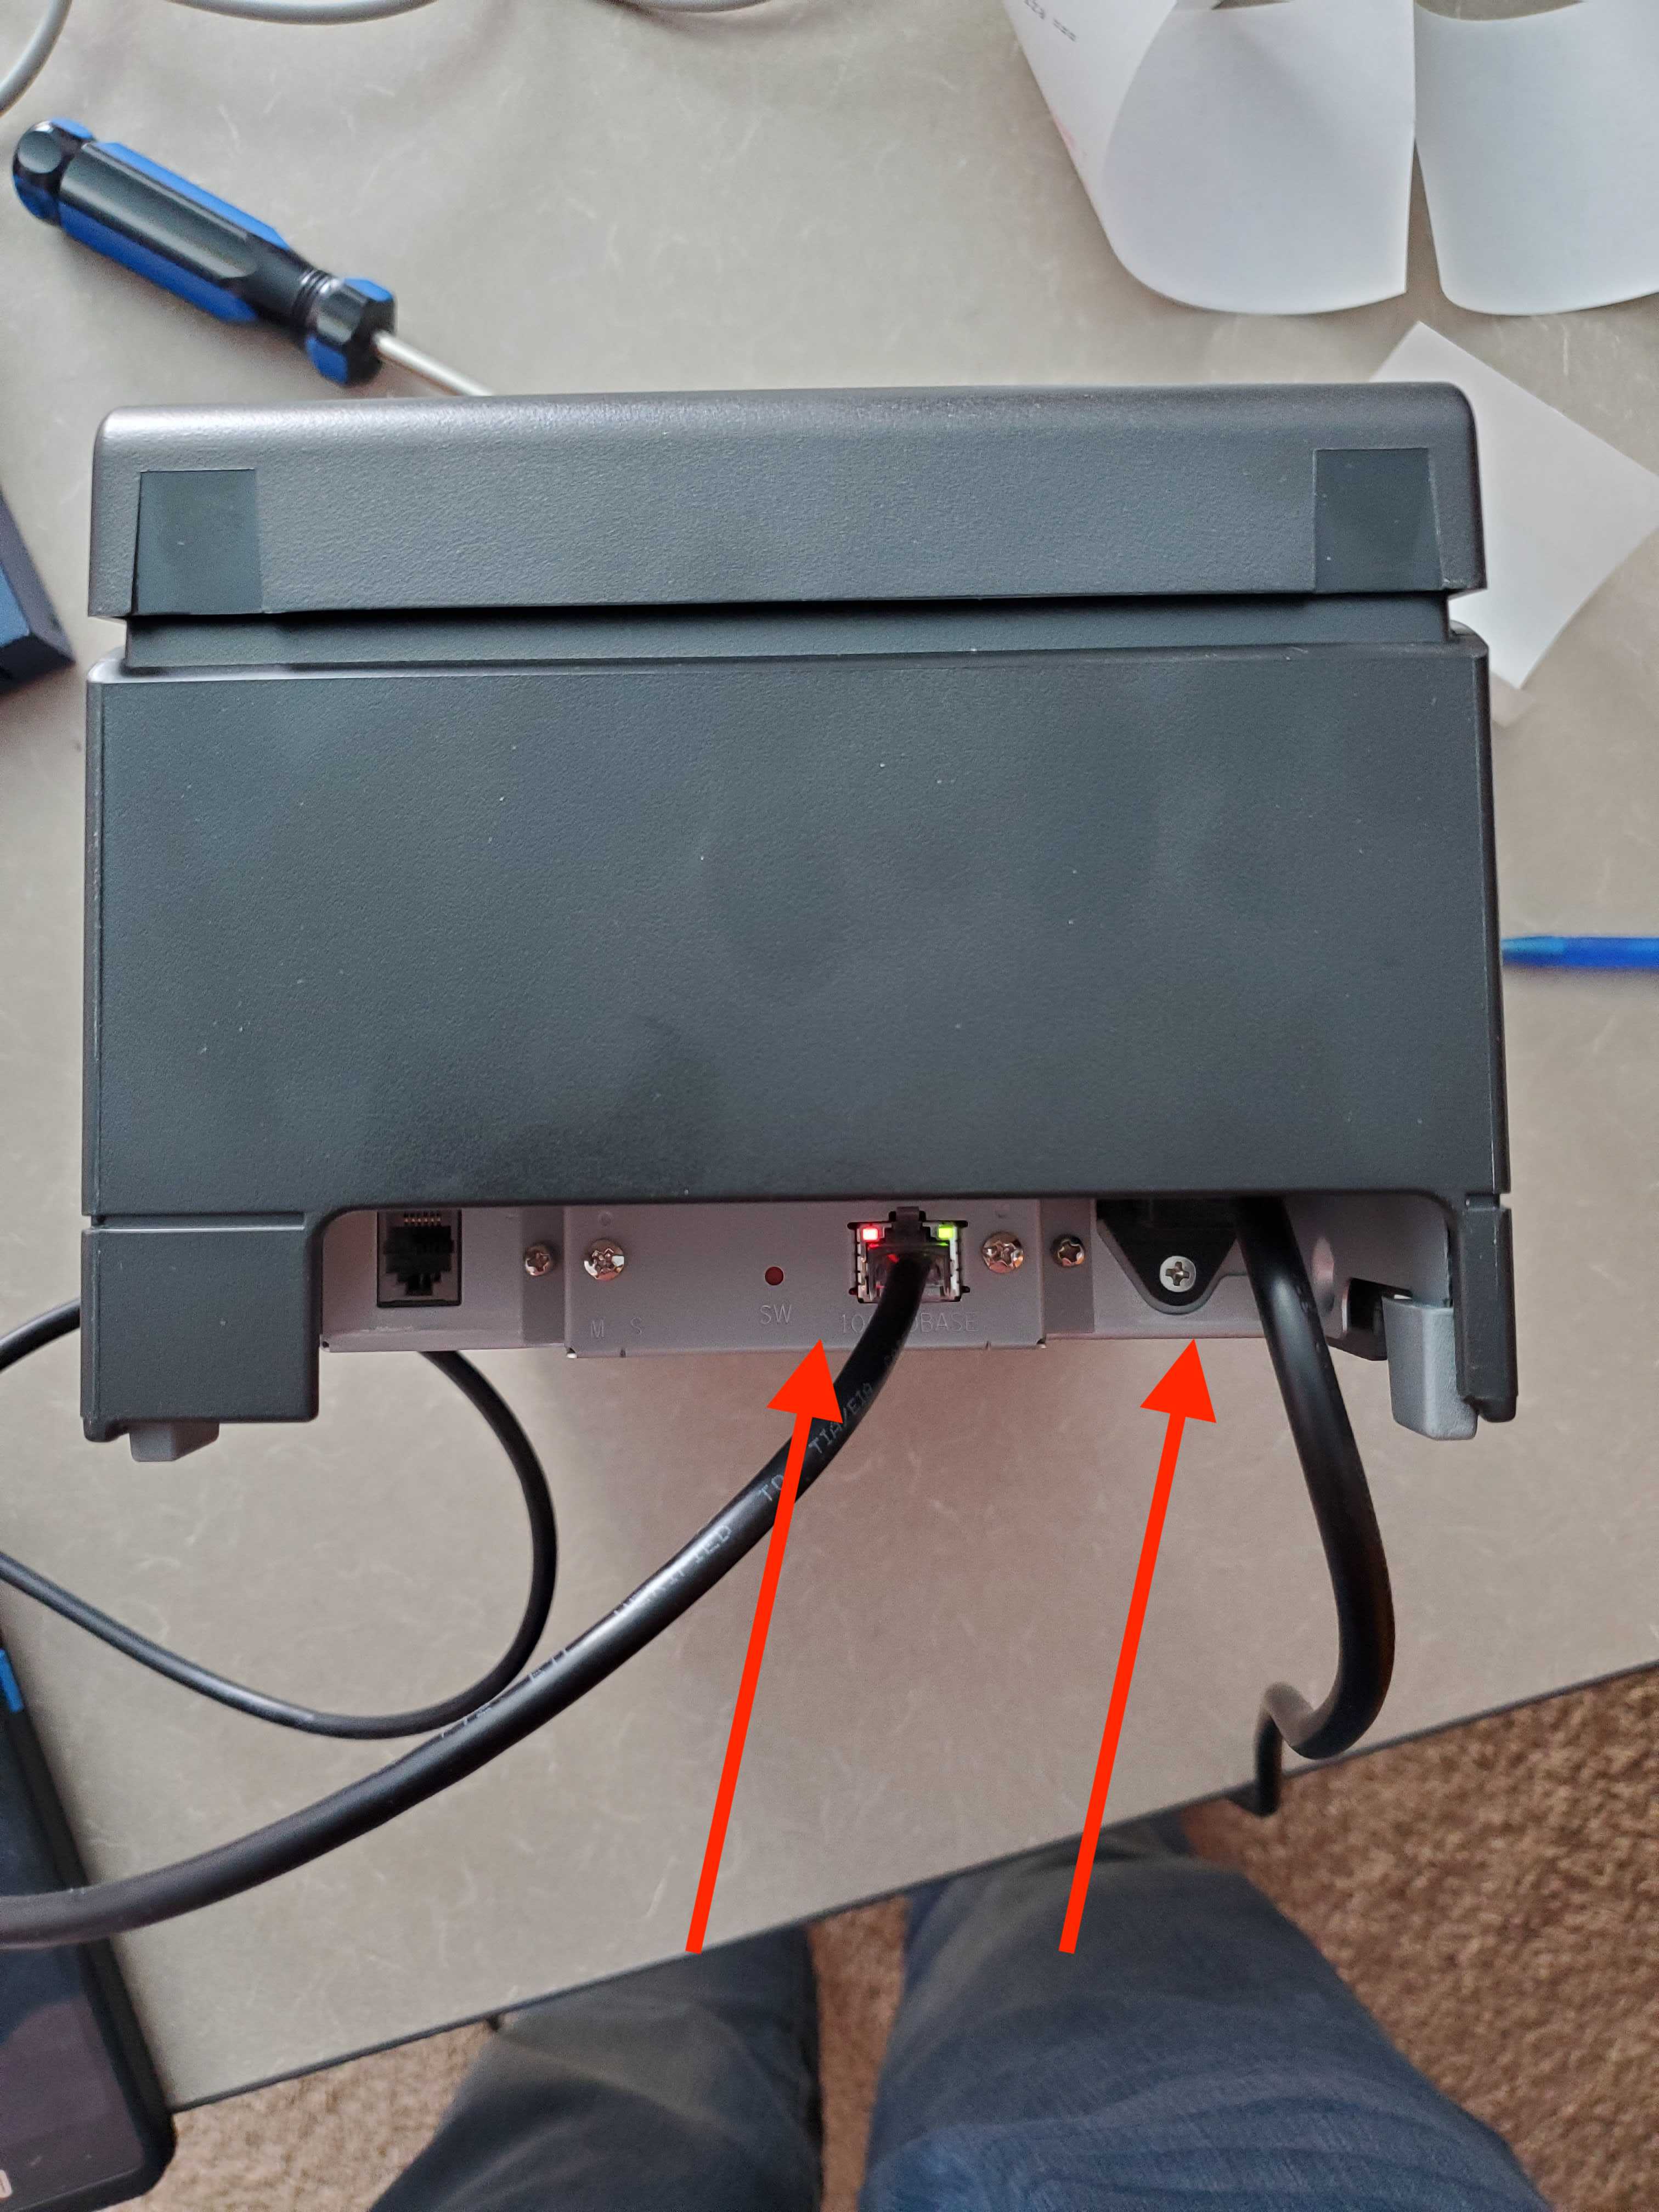
- Plug the Star SP700 or Star SP742 KITCHEN PRINTER into a power outlet using the black power cable (arrow on right side).
- Connect the KITCHEN PRINTER to the ROUTER or SWITCH using an ethernet cable (arrow on left side).
Bixolon SRP-275III
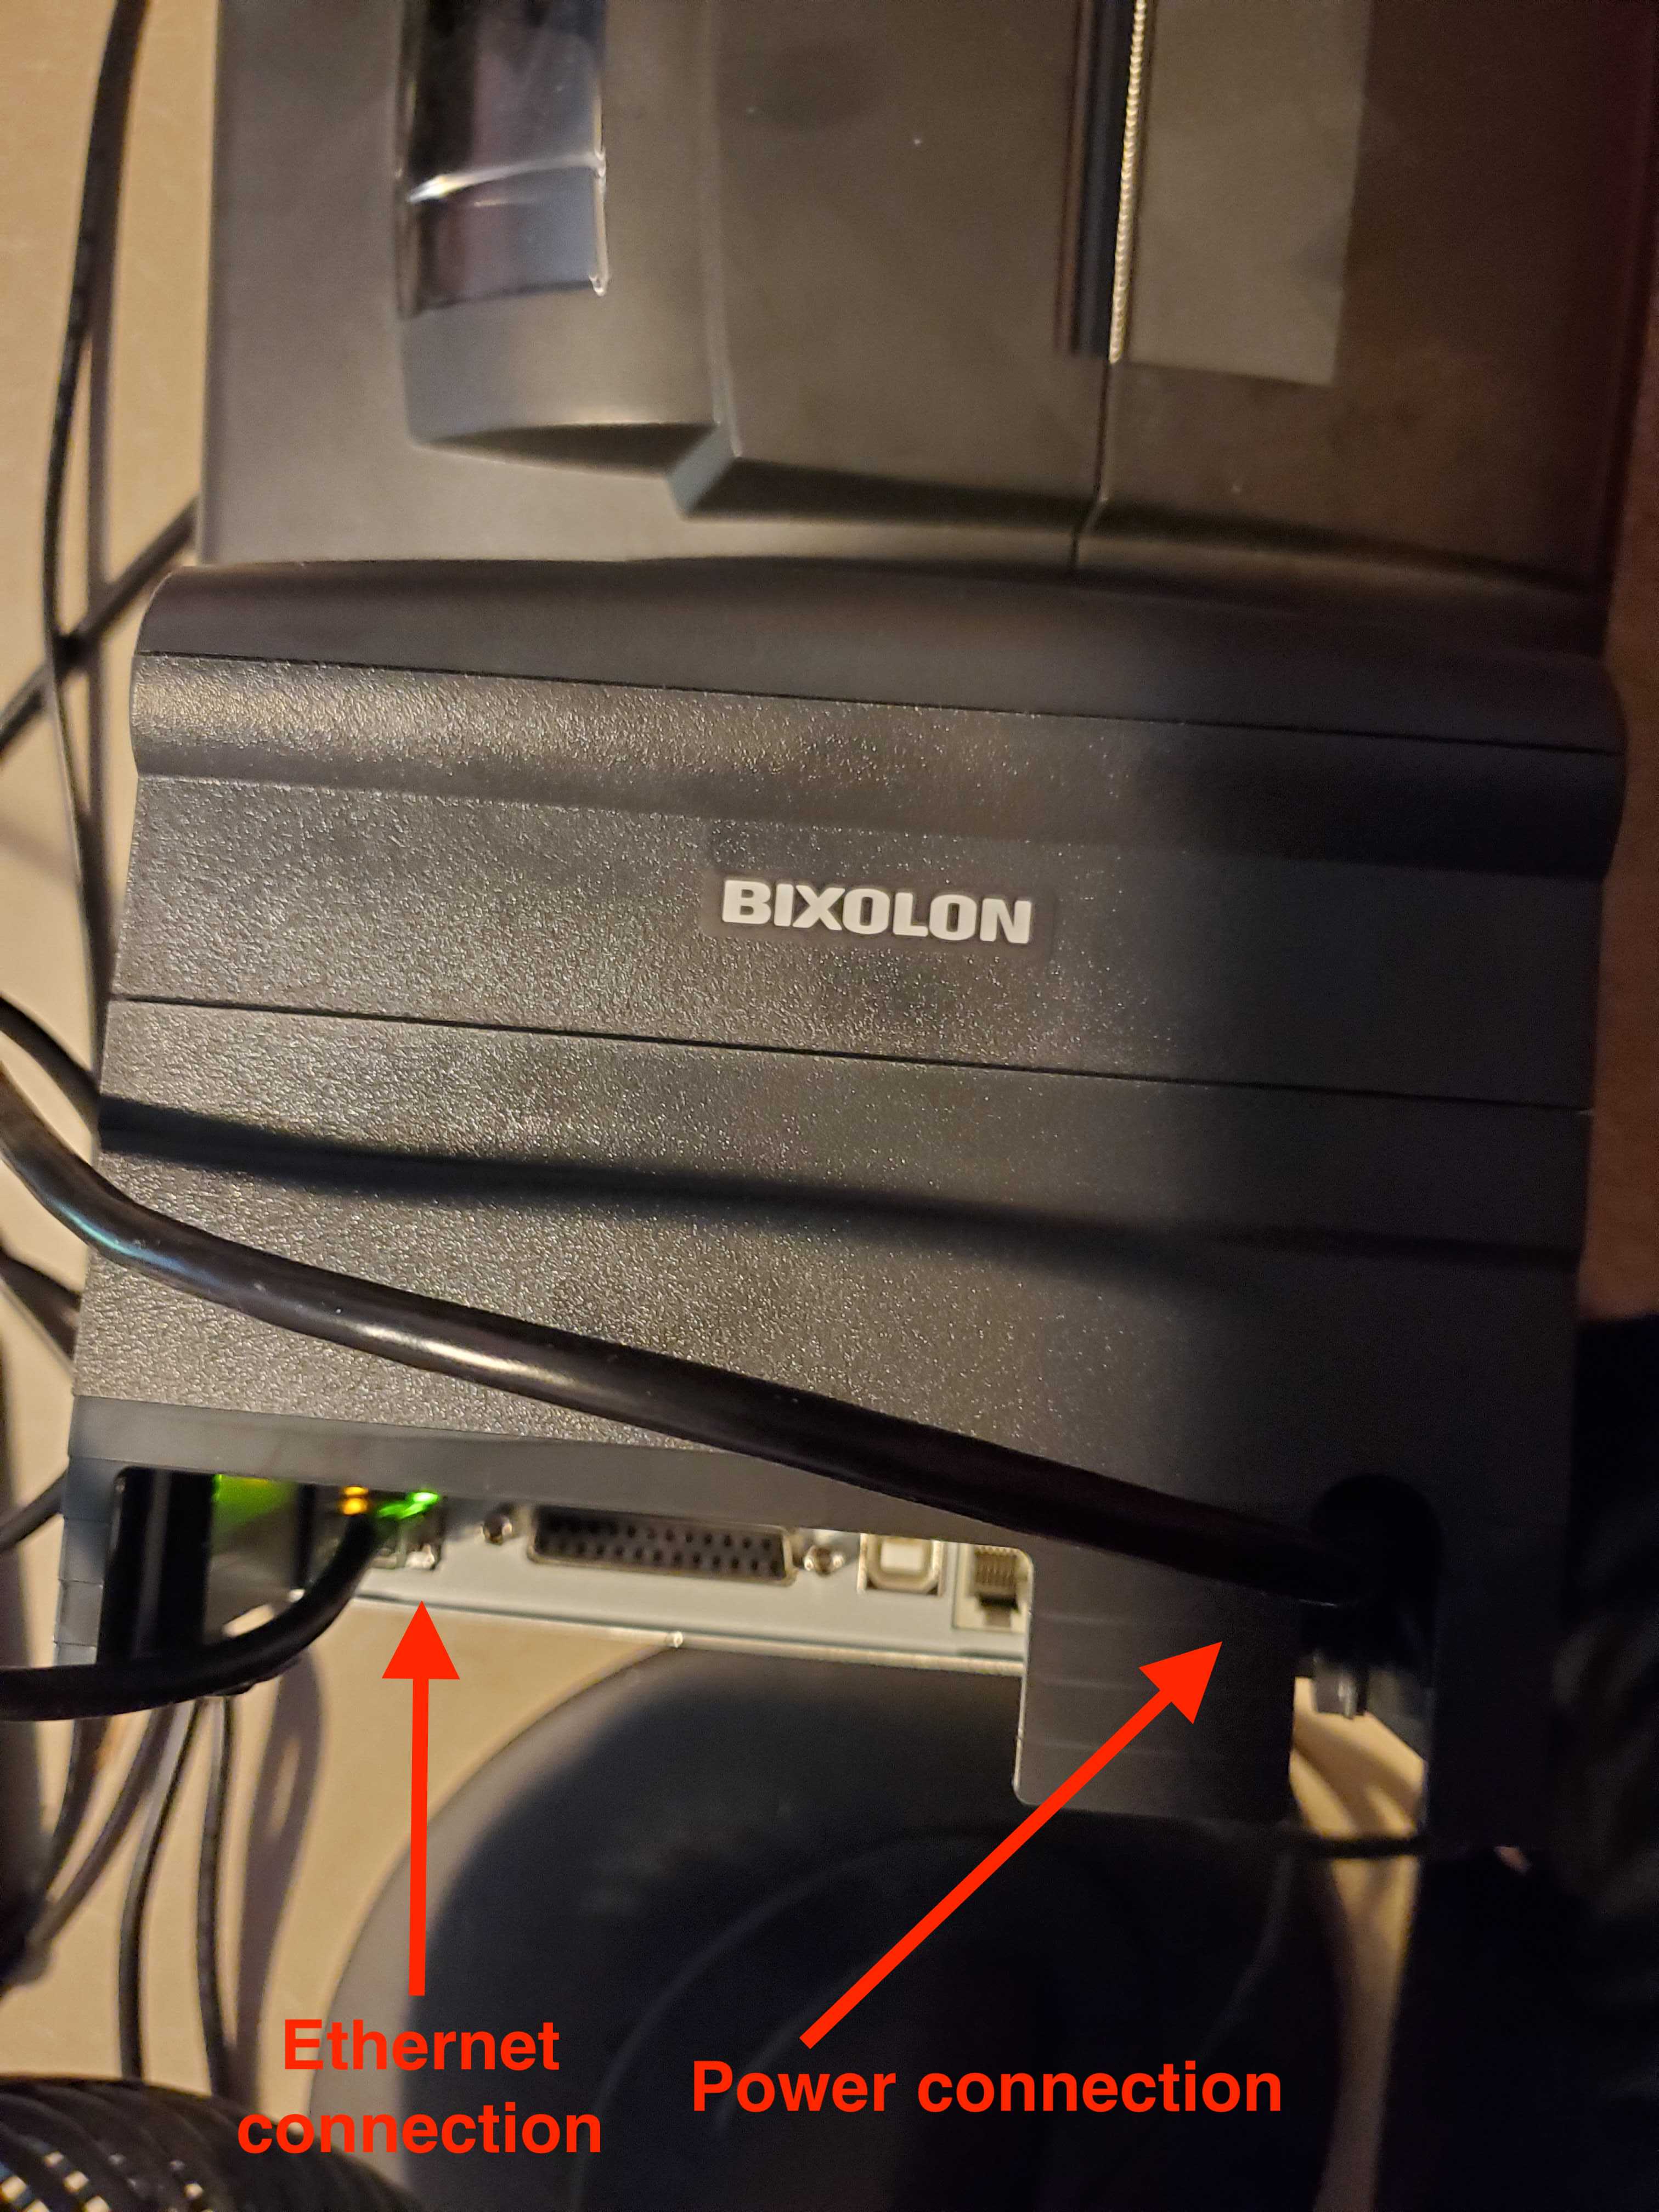
- Plug the Star Bixolon SRP-275III KITCHEN PRINTER into a power outlet using the black power cable (arrow on right side).
- Connect the KITCHEN PRINTER to the ROUTER or SWITCH using an ethernet cable (arrow on left side).
Set Up HQ Printers & Printer Groups
After you connect your printer and cash drawer hardware, you will need to add the printers to HQ and configure your printer settings and routing. To learn how to finish setting up your printers, visit Printing Overview.
Video: Hardware Troubleshooting
If you are setting up your hardware for the first time, watch this video to learn how to troubleshooting common hardware issues during setup and service. In this video you'll learn how to troubleshoot issues related to the following:
Additional Hardware Resources
Printing Overview
Add Printers and Printer Groups
Setting Up the TM-M30 Wireless Printer
Citizen Printer Setup
Cash Drawer Does Not Open
EMV Overview for iOS Terminals
Credit Card Swiper and Charging Overview for iOS
Getting Started with Upserve Tableside
Offline Mode Overview for iOS Terminals
Offline Mode & Internet Connectivity Issues for Android & Tableside
Compatible Hardware & Best Practices
Replacing & Ordering New Hardware 
