Modifiers describes a guest's preference as instruction to the kitchen, such as a 'Serve on Side' instruction or 'Peanut Allergy'. You would create a list of each modifier that describe the specific instructions, before grouping them in a Modifier Group. To learn how to create modifiers, visit Create and Apply Modifiers.
Create a Modifier Group
Modifier Group Fields & Settings
Make a Modifier Group Forced/Required
Arrange the Order Modifier Groups Appear
How to Add Modifiers to Items on the Upserve POS
Create a Modifier Group
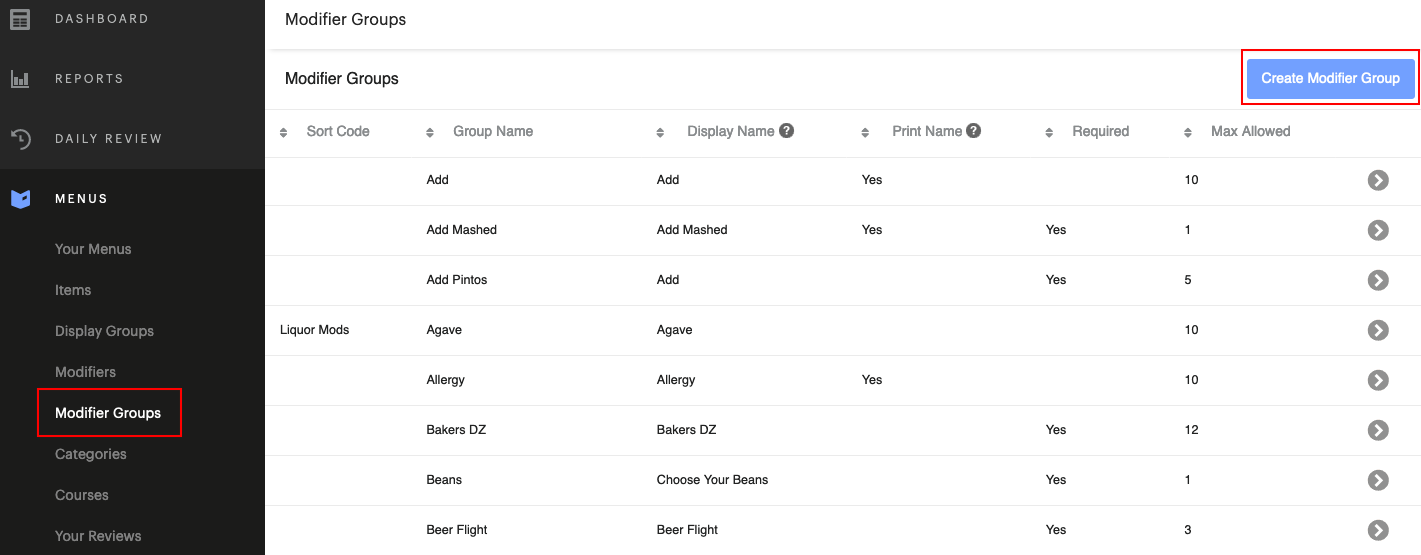
- Log into the HQ (Or tap Menu Setup from the Upserve POS Home screen)
- Click Menus
- Click Modifier Groups
- Click Create Modifier Group
Modifier Group Fields & Settings
Group Name: Select a name for your modifier group in HQ (Ex: Meat Temp, Salad Dressing, Burger Toppings, etc).
Display Name: This section designates how the modifier group name appears on the Upserve POS app. The name will appear to a user when viewing a list of available modifier groups for an item. Enter the same name as Group Name or a name of your choosing.
Print Display Name on Kitchen Chit: Check this setting if you want the Modifier Group + Modifier to print on a chit. (To view example modifier chits, click here).
Show Modifiers in this Group to Online Order Customers: If you want your online order menu items to display modifiers, select Yes for this setting. To learn more about online ordering, see Online Ordering Overview.

Enter Group Sort Code: Sort codes help to organize modifier groups into searchable categories. Type a code that will help you keep track of the item (optional).
Status: By default, new modifier groups are set to Active. If you wish to remove a modifier group from your menu, visit this section, click on Active and select Archive. Then click Save.
How Many Selections Are Possible From This Group:
- Minimum Number: The required number of modifiers needed from this group. This is where you can elect to make a modifier group forced or unforced. (See Make a Modifier Group Forced/Required).
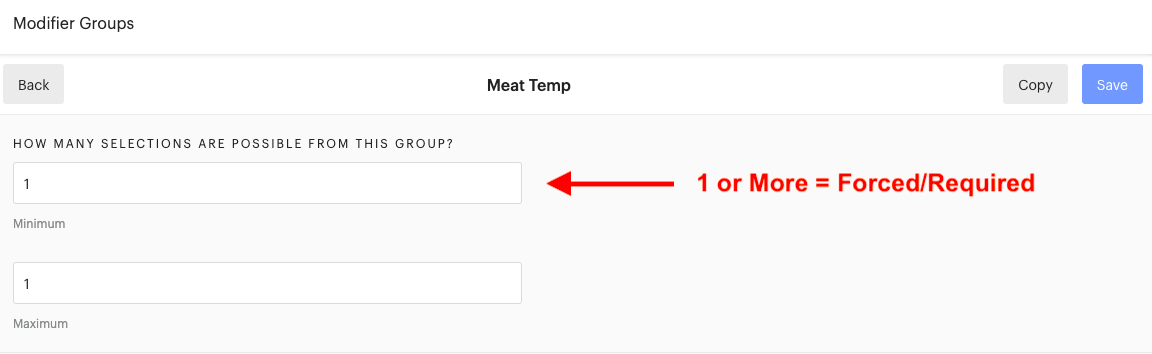
Forced Modifiers - will pop up automatically when an item with a forced modifier is added to a check. To make a modifier group forced, add a minimum selection of 1.
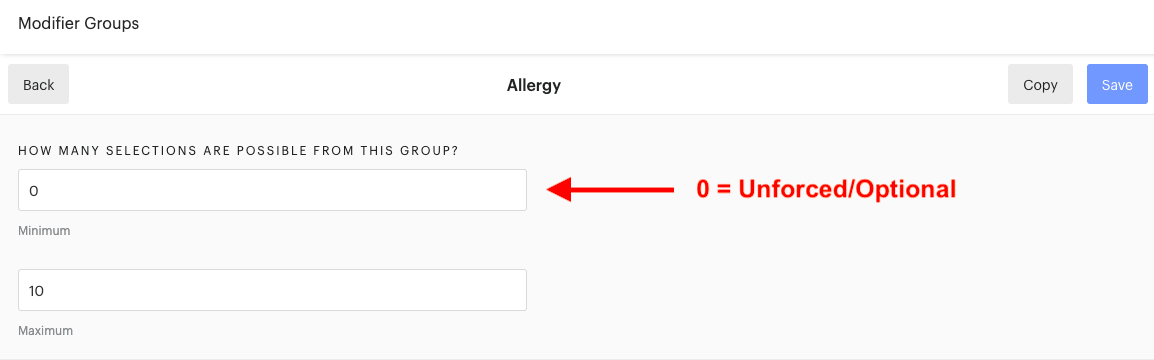
Unforced Modifiers - are available to add to the item by tapping on the item once it is added to the check and will not show automatically. To make a modifier group unforced, add a minimum selection of 0.

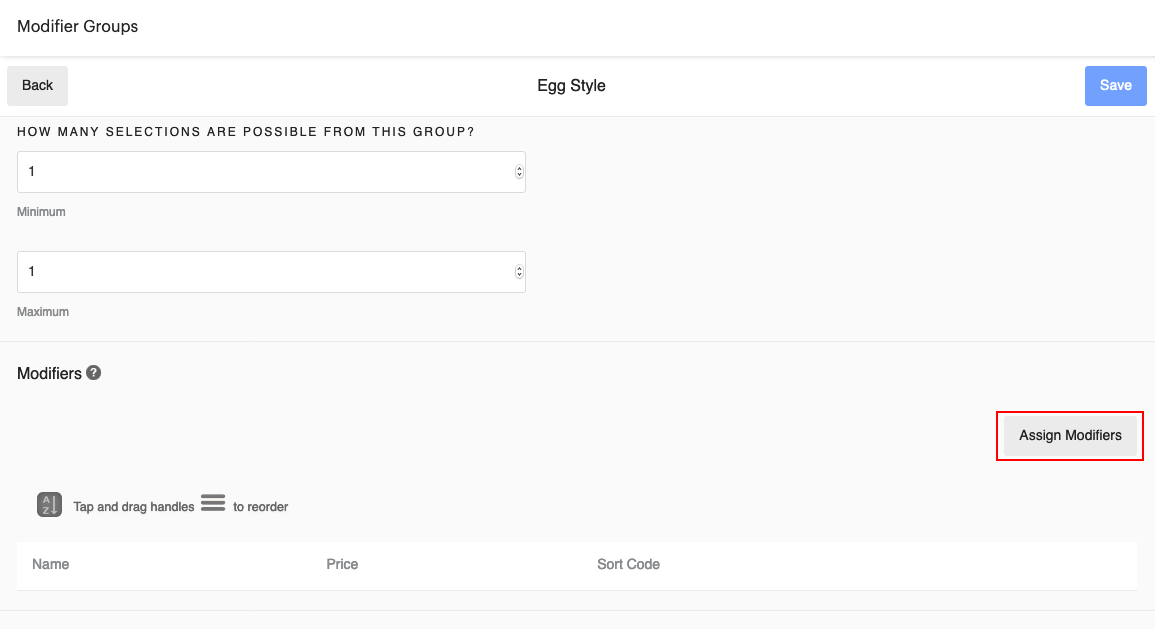
Assign Modifiers: In this section, you will choose the modifier selections for the modifier group.
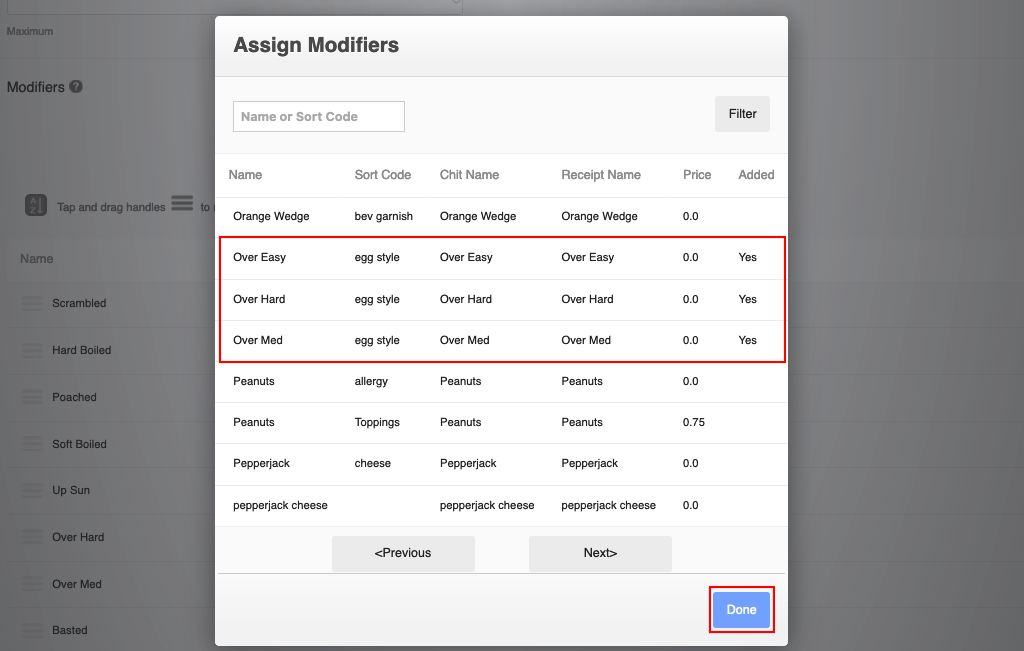
- Click Assign Modifiers
- Click the modifiers that you want to include in the Modifier Group until they say YES
- Click Done
- Click Save
After you Save your modifier group, visit Add or Edit a Menu Item to learn how to assign modifier groups to menu items.
Make a Modifier Group Forced/Required
In the Modifier Group settings, you have the option to make a modifier group forced/required or unforced/optional. Forced Modifier Groups will automatically appear on screen when an employee adds the item (with a forced modifier group attached) to a check and will require the employee to select one or more modifiers from the group.
When Should I Use Forced Modifiers?
Forced Modifiers can be assigned to any item that requires an instruction for the kitchen/preparation station. For example, a guest's preferred meat temperature for a burger is an important instruction for the kitchen. The 'Meat Temp' modifier group should be set up as a forced modifier group, so that employees must select the guest's preferred meat temperature when they add a burger to the check for preparation.
Unforced Modifiers should be used for modifier groups that are used less frequently or are optional. For example, it is important to have an 'Allergies' modifier group available for staff to access, so an allergy modifier can be applied to an item, if needed. Not all guests have food allergies, so it might not make sense for your restaurant to make an 'Allergies' group required. Staff can access unforced modifier groups from the 'Edit Item' screen, allowing them to apply modifiers to items, as needed. |
Make a Modifier Group Forced/Required:
- On the Modifier Group page, scroll down to 'How Many Selections Are Possible From This Group?"
- Enter 1 or more in the Minimum box (this will make the modifier group required)
- Enter 1 or more in the Maximum box, depending on how many modifiers the employee should be able to select
- Click Save
Make a Modifier Group Unforced/Optional:
- On the Modifier Group page, scroll down to 'How Many Selections Are Possible From This Group?"
- Enter 0 in the Minimum box (this will make the modifier group optional)
- Enter 1 or more in the Maximum box, depending on how many modifiers the employee should be able to select
- Click Save
Arrange the Order Modifier Groups Appear
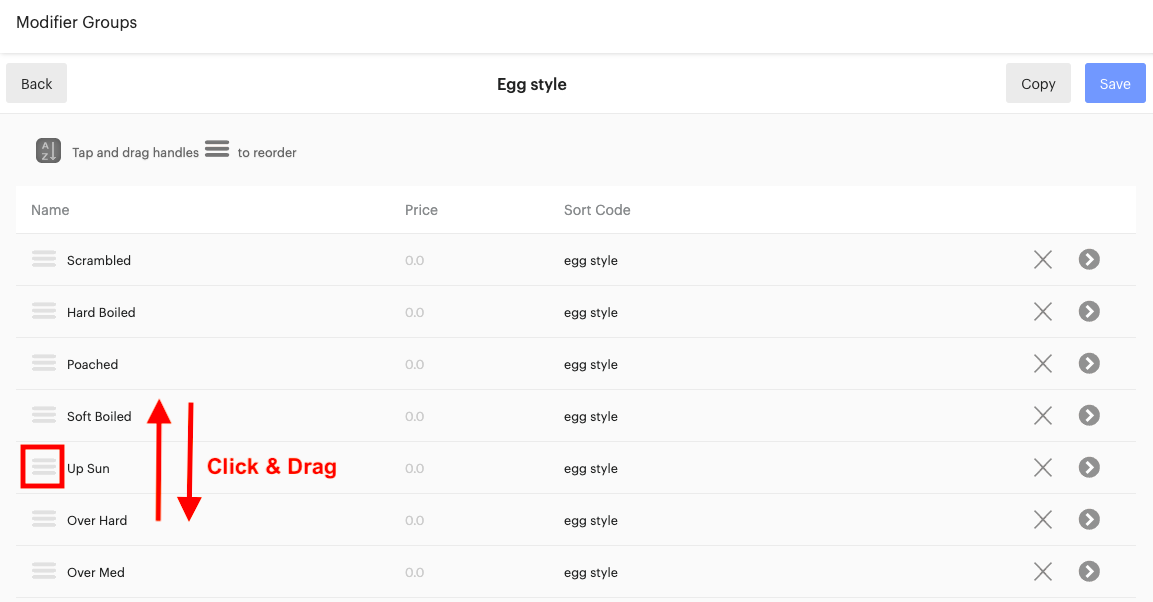
After modifiers are added to the modifier group, you can rearrange the modifier order.
- Click on the drag handle (three grey lines) next to the modifier
- Drag the modifier up or down
- Repeat with remaining modifiers
- Click Save
How to Add Modifiers to Items on the Upserve POS
Add a Forced Modifier to an ItemAdd an Unforced Modifier or Edit a Modifier Selection
Add a Forced Modifier
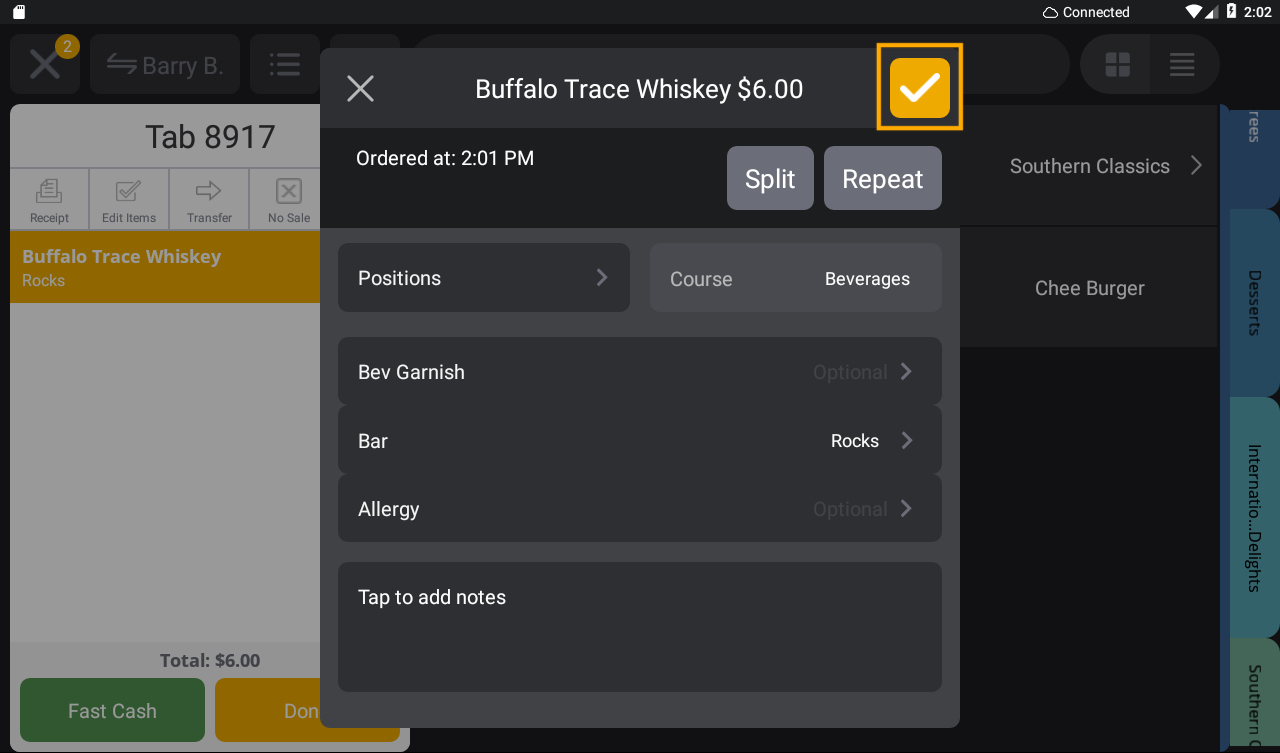
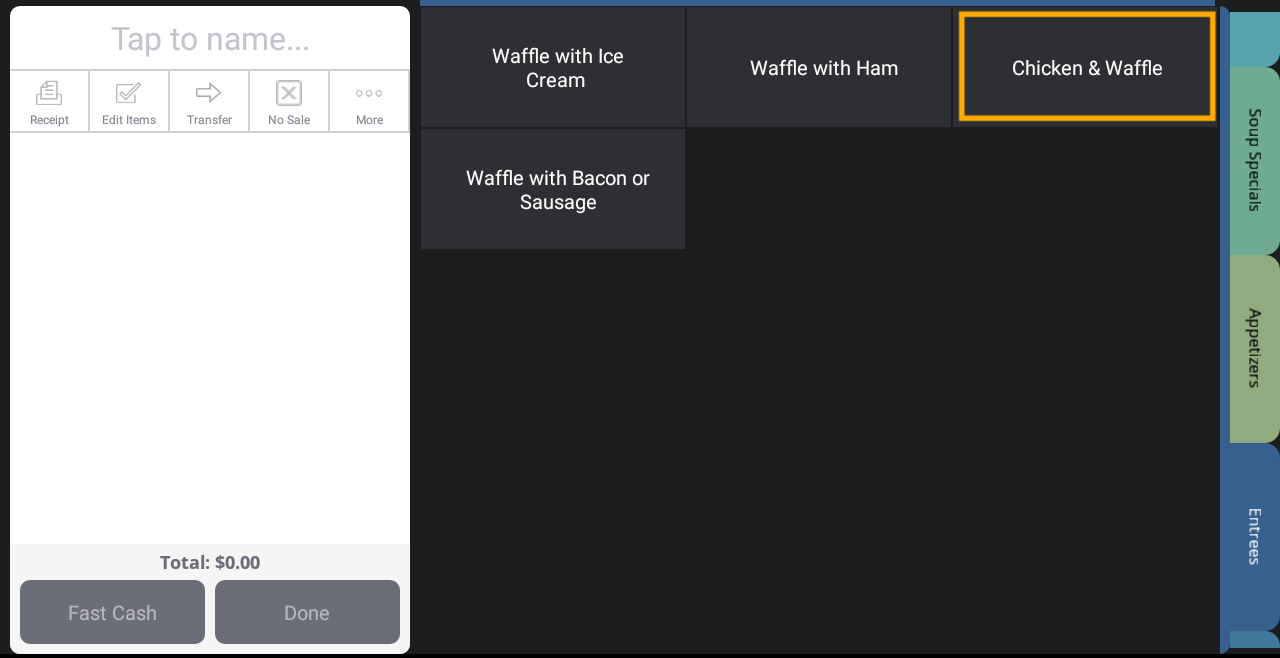
A forced modifier group that is assigned to an item will automatically appear on screen and require a selection when the employee adds the item to a check.
- Tap on the item to add it to the check
- When the forced modifier group screen appears, tap on the modifier(s) you wish to add
- Tap the orange check mark to Save
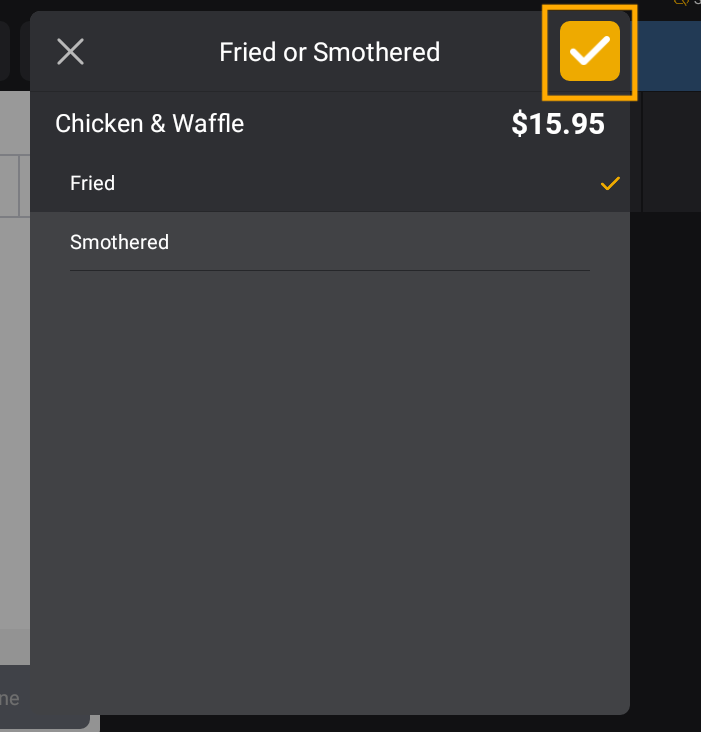
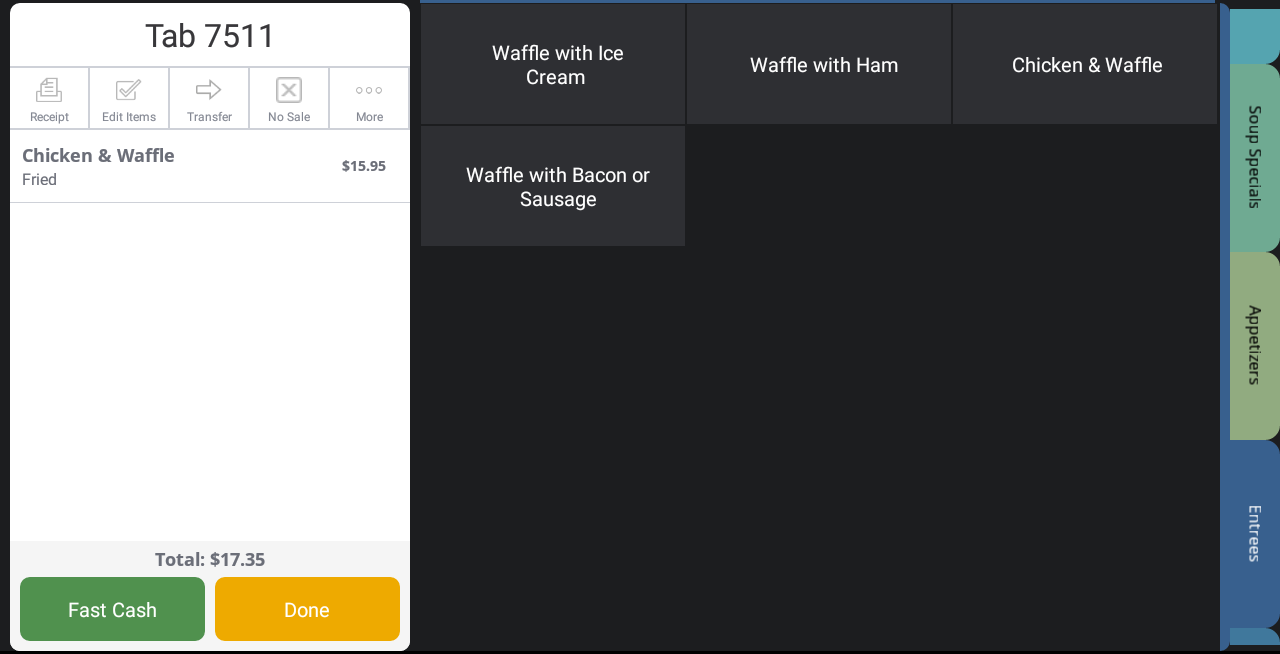
- The modifier will appear beneath the item and will print in red on the kitchen/bar chit when the item is sent
Add an Unforced Modifier or Edit a Modifier Selection
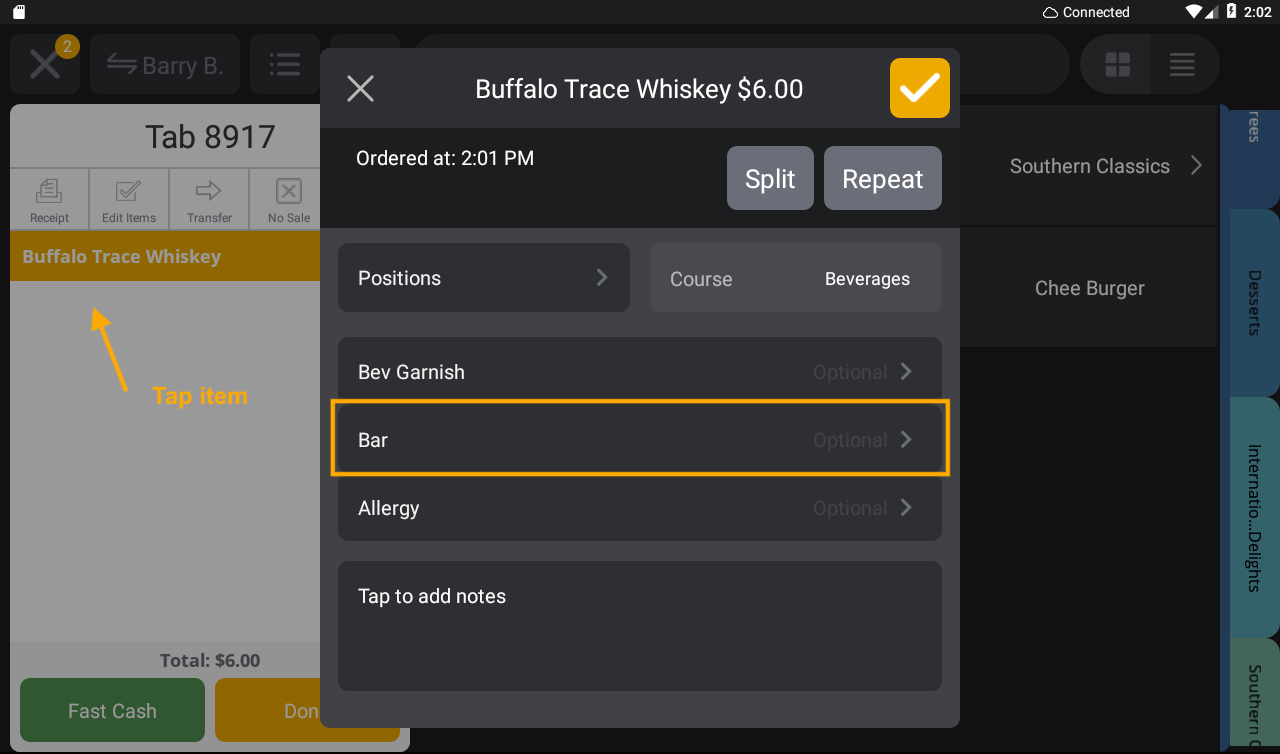
On the 'Edit Item' screen you can edit modifier selections or add an unforced modifier to an item.
- Tap on the item on the check you wish to edit
- Tap on the modifier group (Ex: Bar) to add a modifier to the item
| Edit Modifier Selection: If you need to change a selected modifier for an item, tap on the Modifier Group on the 'Edit Item' screen. Select the preferred modifier. Click the back arrow and orange check mark to Save. |
- Tap on the modifier(s) you wish to add until it is checked
- Tap the back arrow

- Tap the orange check mark to Save
- The modifier will appear beneath the item and will print in red on the kitchen/bar chit when the item is sent
| Note: If you edit an item that has already been 'sent' to the kitchen printer, the printer will print a 'Change' ticket to alert the staff that the item has been changed. |