Categories are a group menu items that share certain characteristics, such as a printer group assignment or inclusive/exclusive tax setting. Categories are also used to group item sales in the Sales Report. After categories are created, they are assigned to menu items. To learn how to create Items, see Add or Edit a Menu Item.
Create a Category
Category Settings
Assign a Category to an Item
Category Reporting
Create a Category
- Log into HQ or pin into the Upserve POS
- Click Menus (or Menu Setup from UPOS)
- Click Categories
- Click Create Category

Category Settings
After clicking Create Category, you will need to fill out the Category settings.
Name: Type a name for your category that indicates what items will be grouped together for printing and reporting (Ex: Wine, Appetizers, Gift Cards, etc).
Subcategory Of: If you want to make a category a sub-category of another category group, you can click on the Sub-Category Of box and select the preferred parent category from the list. Sub-categories will appear with dashes next to them in the HQ Categories list. Sub-categories can be helpful for tracking category sales of related groups.
| Example: If you have a Beer category, you may want to create Can, Bottle and Draft sub-categories so you can track overall beer sales and individual can, bottle and draft sub-category sales. |

To learn more about Category and Sub-Category reporting, see Category Reporting.
Default Printer Group: Select the preferred printer group for the category. All menu items assigned to the category will print to the category printer group, unless the item has an item-level printer group selected. (Ex: If the Pasta category is set to print to the Kitchen printer group, all items in the Pasta category will print to the Kitchen printer group printer). You do not need to select a printer group for a sub-category, if you want the sub-category to use the parent category printer settings.
To learn how to create and manage printer groups, visit Printing Overview.
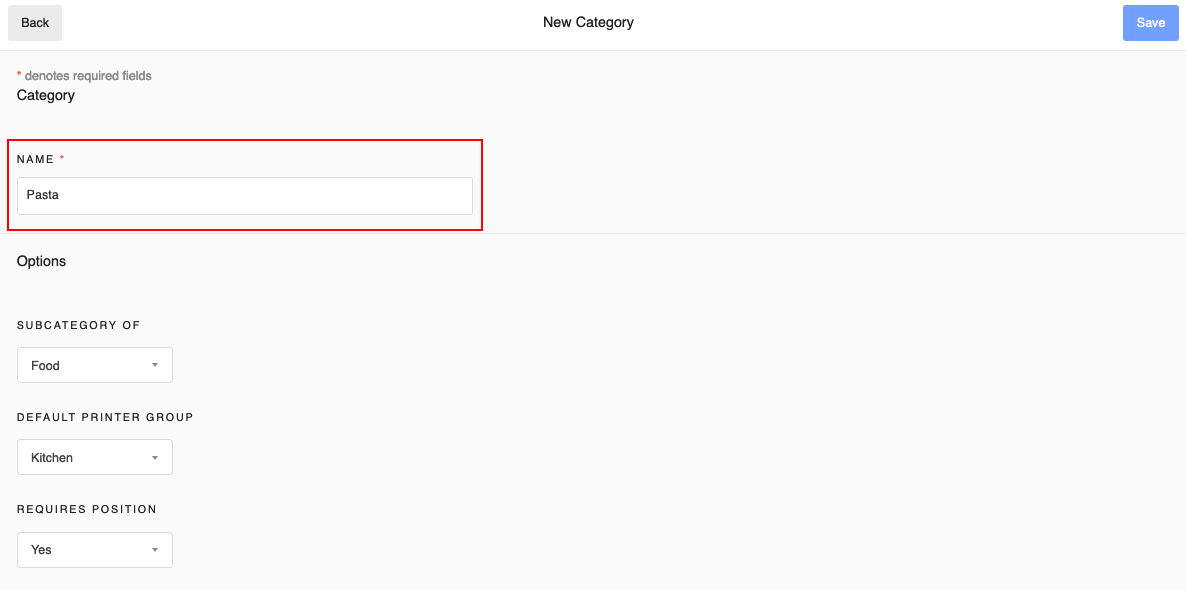
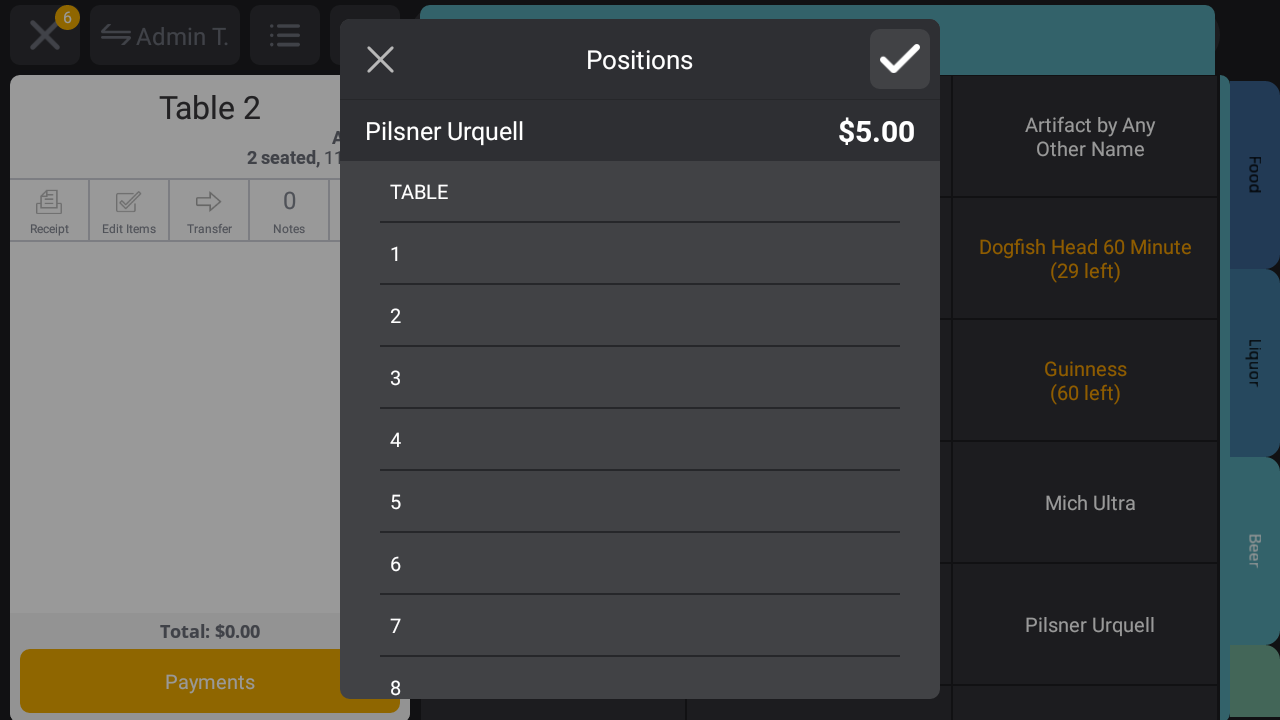
Requires Position: If you want servers to select a seat position for items in the category, select YES for this section. When items from the category are added to an Upserve POS check, a Positions pop-up will appear, requiring the server to select a seat position. If you do not want this pop-up to appear, select NO.
Tax Type: Select a Tax Exclusive or Tax Inclusive tax setting for the category. Items in a Tax Exclusive category will have tax added to the item price. Items in a Tax Inclusive category will have tax included in the item price. To learn more about tax exclusive/inclusive settings, see Sales Tax Overview.
Reset Stock on Close: If items assigned to this category have counts applied to them, you can use this section to select Reset Stock Levels, Keep Stock Levels or Use Default. If you do not use item counts, you can skip this section and leave the default setting on.
- Reset Stock Levels: will reset the the item count at the end of each trading day, restoring it to the original count value.
- Keep Stock Levels: will keep the item count value at the end of the trading day and will let it continue counting down until it is 86'd or out of stock.
- Use Default: will use the primary category stock level setting for sub-categories or Reset Stock Levels setting for categories with no parent category.
To learn more about item stock levels, see Set an Item Count.

| Note: When you finish creating/editing a category, always click SAVE. |
Assign a Category to an Item
After you create a category, you will need to assign the category to an item(s).
- In HQ, click Menus
- Click Items
- Click on an Item to edit
- Scroll down to Categories and click on the course box
- Select preferred Category
- Click Save
To learn how to create and edit Items, see Add or Edit a Menu Item.
Category Reporting
Categories will help you track category-level sales in the Sales Report (Dashboard) and the Product Mix Reports.
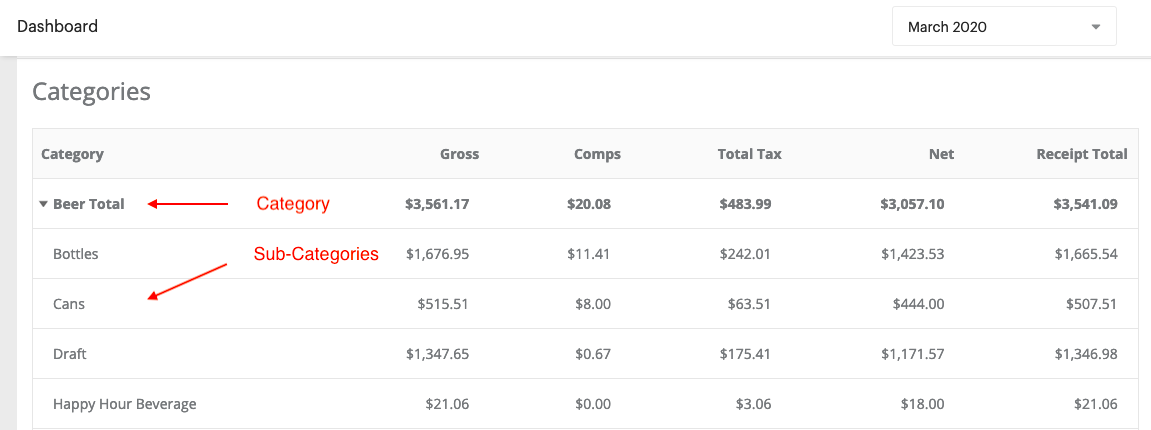
Dashboard - Sales Report
- In HQ, click Dashboard to access the Upserve POS Sales Report
- Scroll down to Categories to view the Gross, Comp, Total Tax, Net and Receipt Total per category
- Click the Date Range box at the top right to change the date range or view category sales data from a specific date

Parent Categories will be bold and have an arrow next to them. Click on the parent category to reveal the sub-categories.
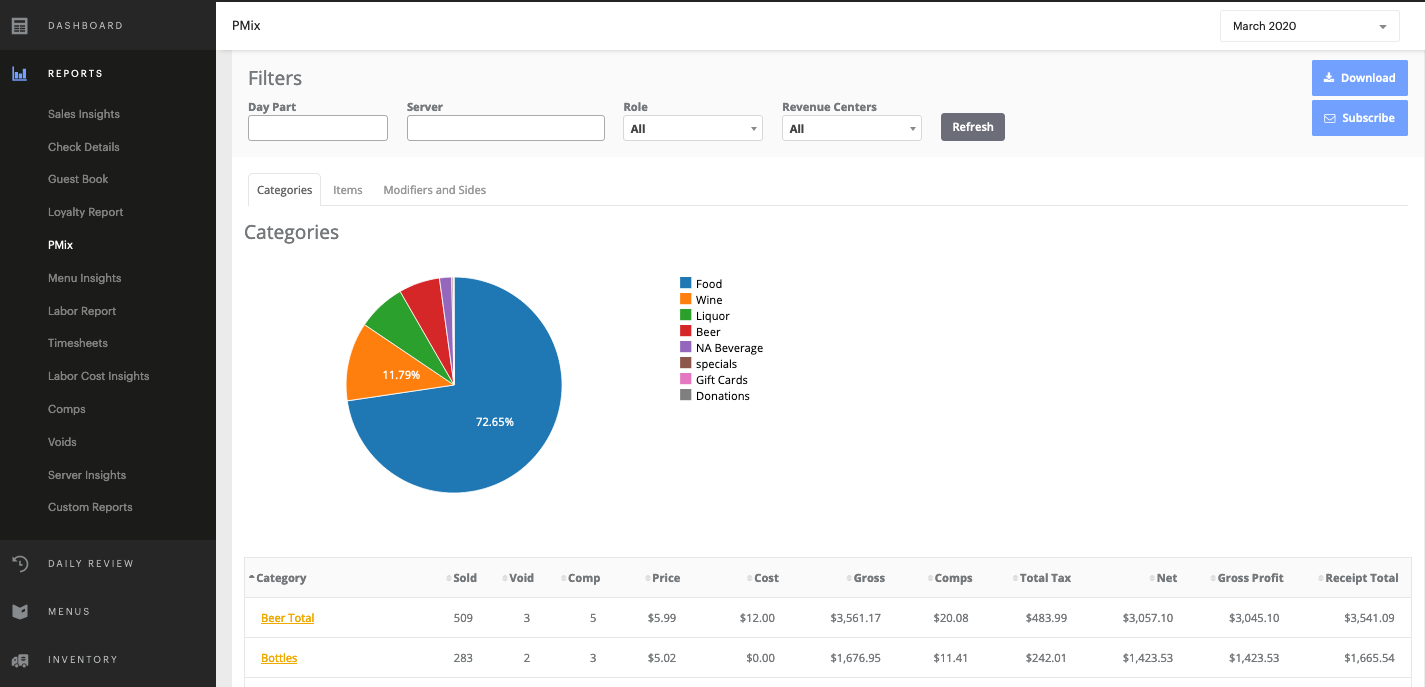
Product Mix Report
- In HQ, click Reports
- Click PMix to open the Product Mix report
- Click the Categories Tab to view item sales data per category
- Click the Date Range box at the top right to change the date range or view category sales data from a specific date